








Sort:
Found 44 results
Momus' Suggestion...
{"query":"best practice for nureva","articles":[{"id":68,"title":"Nureva HDX Series - Pre-Installation Considerations","content":"<h2><span style=\"font-size: 14px;\"><b>IMPORTANT NOTE: <\/b><\/span><\/h2><h2><span style=\"font-size: 14px;\"><b> <\/b><\/span><o:p><\/o:p><\/h2><div class=\"MsoNormal\">This is a summary of the full HDX User Guide, provided by\r\nNureva. We strongly recommend that you\r\nread this in full prior to purchase \/ installation of any HDX system.<\/div><div class=\"MsoNormal\"><br><\/div><div class=\"MsoNormal\"><o:p><\/o:p><\/div><div class=\"MsoNormal\">This overview is provided by Ascentae as a basic guide of\r\nwhat to look for to ensure a smooth installation of HDX systems in a typical\r\ndeployment. As such, advanced\r\nfunctionality such as integration with 3<sup>rd<\/sup> party subwoofers, Adaptive\r\nVoice Amplification and Adaptive Voice Lift are not included in this overview. Additional guidance for these scenarios can\r\nbe found in the full HDX User Guide.<\/div><div class=\"MsoNormal\"><br><\/div><div class=\"MsoNormal\"><o:p><\/o:p><\/div><div class=\"MsoNormal\">For the purposes of this overview, all rooms are considered\r\nto be regular shape. For details of\r\noptions in irregular shaped rooms, refer to the full guide.<o:p><\/o:p><\/div><div class=\"MsoNormal\">As this guide is provided as a pre-installation reference,\r\nit does not cover the installation process. \r\nDetails of installation best practice can be found in the full guide or\r\non the Nureva support site \u2013 support.nureva.com.<o:p><\/o:p><\/div><div class=\"MsoNormal\"><o:p> <\/o:p><\/div><div>\r\n\r\n\r\n\r\n\r\n\r\n\r\n\r\n\r\n\r\n\r\n\r\n<\/div><div class=\"MsoNormal\">The full HDX guide can be found here - <a href=\"https:\/\/www.nureva.com\/user-guide\/hdx\" target=\"_blank\">https:\/\/www.nureva.com\/user-guide\/hdx<\/a><a href=\"https:\/\/www.nureva.com\/user-guide\/hdx\"><\/a><\/div><div class=\"MsoNormal\"><b><br><\/b><\/div><div class=\"MsoNormal\"><b>HDX Overview<\/b><\/div><h2><br><\/h2><h2><o:p><\/o:p><\/h2><div class=\"MsoNormal\">The Nureva HDX series is a mutli-component audio system\r\nwhich is suitable in spaces up to 223m<sup>2<\/sup>. It consists of 3 elements \u2013\r\nProviding full range distributed audio, adaptive voice lift, adaptive voice\r\namplification, full room microphone coverage, assisted listening via Auracast\r\nand full connectivity to UC platforms (Teams, Zoom etc).<\/div><div class=\"MsoNormal\"><br><\/div><div class=\"MsoNormal\"> <o:p><\/o:p><\/div><div class=\"MsoNormal\">\r\n\r\n\r\n\r\n\r\n<o:p><\/o:p><\/div><div class=\"MsoNormal\">The HDX series offers 5 modular configurations, consisting\r\nof 3 components.<\/div><div class=\"MsoNormal\"><o:p><br><\/o:p><\/div><div class=\"MsoNormal\"><div class=\"MsoNormal\" style=\"--tw-border-spacing-y: 0; --tw-translate-x: 0; --tw-translate-y: 0; --tw-rotate: 0; --tw-skew-x: 0; --tw-skew-y: 0; --tw-scale-x: 1; --tw-scale-y: 1; --tw-pan-x: ; --tw-pan-y: ; --tw-pinch-zoom: ; --tw-scroll-snap-strictness: proximity; --tw-gradient-from-position: ; --tw-gradient-via-position: ; --tw-gradient-to-position: ; --tw-ordinal: ; --tw-slashed-zero: ; --tw-numeric-figure: ; --tw-numeric-spacing: ; --tw-numeric-fraction: ; --tw-ring-inset: ; --tw-ring-offset-width: 0px; --tw-ring-offset-color: #fff; --tw-ring-color: rgb(59 130 246 \/ 0.5); --tw-ring-offset-shadow: 0 0 #0000; --tw-ring-shadow: 0 0 #0000; --tw-shadow: 0 0 #0000; --tw-shadow-colored: 0 0 #0000; --tw-blur: ; --tw-brightness: ; --tw-contrast: ; --tw-grayscale: ; --tw-hue-rotate: ; --tw-invert: ; --tw-saturate: ; --tw-sepia: ; --tw-drop-shadow: ; --tw-backdrop-blur: ; --tw-backdrop-brightness: ; --tw-backdrop-contrast: ; --tw-backdrop-grayscale: ; --tw-backdrop-hue-rotate: ; --tw-backdrop-invert: ; --tw-backdrop-opacity: ; --tw-backdrop-saturate: ; --tw-backdrop-sepia: ; --tw-contain-size: ; --tw-contain-layout: ; --tw-contain-paint: ; --tw-contain-style: ;\"><b>System Hub <\/b><\/div><div class=\"MsoNormal\" style=\"--tw-border-spacing-y: 0; --tw-translate-x: 0; --tw-translate-y: 0; --tw-rotate: 0; --tw-skew-x: 0; --tw-skew-y: 0; --tw-scale-x: 1; --tw-scale-y: 1; --tw-pan-x: ; --tw-pan-y: ; --tw-pinch-zoom: ; --tw-scroll-snap-strictness: proximity; --tw-gradient-from-position: ; --tw-gradient-via-position: ; --tw-gradient-to-position: ; --tw-ordinal: ; --tw-slashed-zero: ; --tw-numeric-figure: ; --tw-numeric-spacing: ; --tw-numeric-fraction: ; --tw-ring-inset: ; --tw-ring-offset-width: 0px; --tw-ring-offset-color: #fff; --tw-ring-color: rgb(59 130 246 \/ 0.5); --tw-ring-offset-shadow: 0 0 #0000; --tw-ring-shadow: 0 0 #0000; --tw-shadow: 0 0 #0000; --tw-shadow-colored: 0 0 #0000; --tw-blur: ; --tw-brightness: ; --tw-contrast: ; --tw-grayscale: ; --tw-hue-rotate: ; --tw-invert: ; --tw-saturate: ; --tw-sepia: ; --tw-drop-shadow: ; --tw-backdrop-blur: ; --tw-backdrop-brightness: ; --tw-backdrop-contrast: ; --tw-backdrop-grayscale: ; --tw-backdrop-hue-rotate: ; --tw-backdrop-invert: ; --tw-backdrop-opacity: ; --tw-backdrop-saturate: ; --tw-backdrop-sepia: ; --tw-contain-size: ; --tw-contain-layout: ; --tw-contain-paint: ; --tw-contain-style: ;\"><b><br><\/b><\/div><div class=\"MsoNormal\" style=\"--tw-border-spacing-y: 0; --tw-translate-x: 0; --tw-translate-y: 0; --tw-rotate: 0; --tw-skew-x: 0; --tw-skew-y: 0; --tw-scale-x: 1; --tw-scale-y: 1; --tw-pan-x: ; --tw-pan-y: ; --tw-pinch-zoom: ; --tw-scroll-snap-strictness: proximity; --tw-gradient-from-position: ; --tw-gradient-via-position: ; --tw-gradient-to-position: ; --tw-ordinal: ; --tw-slashed-zero: ; --tw-numeric-figure: ; --tw-numeric-spacing: ; --tw-numeric-fraction: ; --tw-ring-inset: ; --tw-ring-offset-width: 0px; --tw-ring-offset-color: #fff; --tw-ring-color: rgb(59 130 246 \/ 0.5); --tw-ring-offset-shadow: 0 0 #0000; --tw-ring-shadow: 0 0 #0000; --tw-shadow: 0 0 #0000; --tw-shadow-colored: 0 0 #0000; --tw-blur: ; --tw-brightness: ; --tw-contrast: ; --tw-grayscale: ; --tw-hue-rotate: ; --tw-invert: ; --tw-saturate: ; --tw-sepia: ; --tw-drop-shadow: ; --tw-backdrop-blur: ; --tw-backdrop-brightness: ; --tw-backdrop-contrast: ; --tw-backdrop-grayscale: ; --tw-backdrop-hue-rotate: ; --tw-backdrop-invert: ; --tw-backdrop-opacity: ; --tw-backdrop-saturate: ; --tw-backdrop-sepia: ; --tw-contain-size: ; --tw-contain-layout: ; --tw-contain-paint: ; --tw-contain-style: ;\"><div class=\"MsoNormal\" style=\"--tw-translate-x: 0; --tw-translate-y: 0; --tw-rotate: 0; --tw-skew-x: 0; --tw-skew-y: 0; --tw-scale-x: 1; --tw-scale-y: 1; --tw-pan-x: ; --tw-pan-y: ; --tw-pinch-zoom: ; --tw-scroll-snap-strictness: proximity; --tw-gradient-from-position: ; --tw-gradient-via-position: ; --tw-gradient-to-position: ; --tw-ordinal: ; --tw-slashed-zero: ; --tw-numeric-figure: ; --tw-numeric-spacing: ; --tw-numeric-fraction: ; --tw-ring-inset: ; --tw-ring-offset-width: 0px; --tw-ring-offset-color: #fff; --tw-ring-color: rgb(59 130 246 \/ 0.5); --tw-ring-offset-shadow: 0 0 #0000; --tw-ring-shadow: 0 0 #0000; --tw-shadow: 0 0 #0000; --tw-shadow-colored: 0 0 #0000; --tw-blur: ; --tw-brightness: ; --tw-contrast: ; --tw-grayscale: ; --tw-hue-rotate: ; --tw-invert: ; --tw-saturate: ; --tw-sepia: ; --tw-drop-shadow: ; --tw-backdrop-blur: ; --tw-backdrop-brightness: ; --tw-backdrop-contrast: ; --tw-backdrop-grayscale: ; --tw-backdrop-hue-rotate: ; --tw-backdrop-invert: ; --tw-backdrop-opacity: ; --tw-backdrop-saturate: ; --tw-backdrop-sepia: ; --tw-contain-size: ; --tw-contain-layout: ; --tw-contain-paint: ; --tw-contain-style: ;\">All in one system eliminating need for separate DSP\u2019s, amps and Bluetooth transmitters<\/div><\/div><\/div><table class=\"table table-bordered\"><tbody><tr><td><div class=\"MsoNormal\"><span style=\"font-size: 14px;\"><br><\/span><o:p><\/o:p><\/div>\r\n\r\n<div class=\"MsoListParagraphCxSpFirst\" style=\"text-indent:-18.0pt;mso-list:l0 level1 lfo2\"><!--[if !supportLists]-->-<span style=\"font-style: normal; font-variant: normal; font-size-adjust: none; font-language-override: normal; font-kerning: auto; font-optical-sizing: auto; font-feature-settings: normal; font-variation-settings: normal; font-stretch: normal; font-size: 7pt; line-height: normal; font-family: \" times=\"\" new=\"\" roman\";\"=\"\"> <span style=\"font-size: 12pt;\"> \r\n<\/span><\/span><!--[endif]--><span style=\"font-size: 12pt;\">AV-over-IP for single cable installation<\/span><o:p><\/o:p><\/div>\r\n\r\n<div class=\"MsoListParagraphCxSpMiddle\" style=\"text-indent:-18.0pt;mso-list:l1 level1 lfo1\"><!--[if !supportLists]-->-<span style=\"font-style: normal; font-variant: normal; font-size-adjust: none; font-language-override: normal; font-kerning: auto; font-optical-sizing: auto; font-feature-settings: normal; font-variation-settings: normal; font-stretch: normal; font-size: 7pt; line-height: normal; font-family: \" times=\"\" new=\"\" roman\";\"=\"\"> \r\n<\/span><!--[endif]-->Bluetooth audio streaming<o:p><\/o:p><\/div>\r\n\r\n<div class=\"MsoListParagraphCxSpMiddle\" style=\"text-indent:-18.0pt;mso-list:l1 level1 lfo1\"><!--[if !supportLists]-->-<span style=\"font-style: normal; font-variant: normal; font-size-adjust: none; font-language-override: normal; font-kerning: auto; font-optical-sizing: auto; font-feature-settings: normal; font-variation-settings: normal; font-stretch: normal; font-size: 7pt; line-height: normal; font-family: \" times=\"\" new=\"\" roman\";\"=\"\"> \r\n<\/span><!--[endif]-->Auracast broadcast audio<o:p><\/o:p><\/div>\r\n\r\n<div class=\"MsoListParagraphCxSpMiddle\" style=\"text-indent:-18.0pt;mso-list:l1 level1 lfo1\"><!--[if !supportLists]-->-<span style=\"font-style: normal; font-variant: normal; font-size-adjust: none; font-language-override: normal; font-kerning: auto; font-optical-sizing: auto; font-feature-settings: normal; font-variation-settings: normal; font-stretch: normal; font-size: 7pt; line-height: normal; font-family: \" times=\"\" new=\"\" roman\";\"=\"\"> \r\n<\/span><!--[endif]-->Intelligent compute features including camera\r\ntracking, controller integration & device management<o:p><\/o:p><\/div>\r\n\r\n<div class=\"MsoListParagraphCxSpLast\" style=\"text-indent:-18.0pt;mso-list:l1 level1 lfo1\"><!--[if !supportLists]-->-<span style=\"font-style: normal; font-variant: normal; font-size-adjust: none; font-language-override: normal; font-kerning: auto; font-optical-sizing: auto; font-feature-settings: normal; font-variation-settings: normal; font-stretch: normal; font-size: 7pt; line-height: normal; font-family: \" times=\"\" new=\"\" roman\";\"=\"\"> \r\n<\/span><!--[endif]-->Passive cooling for quiet operation<o:p><\/o:p><\/div>\r\n\r\n<span style=\"font-size: 14pt; line-height: 107%; font-family: Calibri, sans-serif;\">Sleep mode for energy conservation<\/span><\/td><td><div><img src=\"..\/assets\/resources\/articles\/media-uploads\/media_6a565b4ec250b.png\" style=\"max-width: 100%;\"><br><\/div><\/td><\/tr><tr><td><div><div class=\"MsoNormal\"><b>Audio Bars<\/b><\/div><div class=\"MsoNormal\"><b><br>\r\n<\/b>Speakers \/ microphones combined in single, easy to install unit to support\r\ndistributed audio.<\/div><div class=\"MsoNormal\"><br><\/div><div class=\"MsoNormal\"><o:p><\/o:p><\/div>\r\n\r\n<div class=\"MsoListParagraphCxSpFirst\" style=\"text-indent:-18.0pt;mso-list:l0 level1 lfo1\"><!--[if !supportLists]-->-<span style=\"font-style: normal; font-variant: normal; font-size-adjust: none; font-language-override: normal; font-kerning: auto; font-optical-sizing: auto; font-feature-settings: normal; font-variation-settings: normal; font-stretch: normal; font-size: 7pt; line-height: normal; font-family: \" times=\"\" new=\"\" roman\";\"=\"\"> \r\n<\/span><!--[endif]-->Full range distributed audio and full room\r\nmicrophone coverage<o:p><\/o:p><\/div>\r\n\r\n<div class=\"MsoListParagraphCxSpMiddle\" style=\"text-indent:-18.0pt;mso-list:l0 level1 lfo1\"><!--[if !supportLists]-->-<span style=\"font-style: normal; font-variant: normal; font-size-adjust: none; font-language-override: normal; font-kerning: auto; font-optical-sizing: auto; font-feature-settings: normal; font-variation-settings: normal; font-stretch: normal; font-size: 7pt; line-height: normal; font-family: \" times=\"\" new=\"\" roman\";\"=\"\"> \r\n<\/span><!--[endif]-->2-way speaker system with tweeter & dual\r\nwoofer<o:p><\/o:p><\/div>\r\n\r\n<div class=\"MsoListParagraphCxSpMiddle\" style=\"text-indent:-18.0pt;mso-list:l0 level1 lfo1\"><!--[if !supportLists]-->-<span style=\"font-style: normal; font-variant: normal; font-size-adjust: none; font-language-override: normal; font-kerning: auto; font-optical-sizing: auto; font-feature-settings: normal; font-variation-settings: normal; font-stretch: normal; font-size: 7pt; line-height: normal; font-family: \" times=\"\" new=\"\" roman\";\"=\"\"> \r\n<\/span><!--[endif]-->2 dimensional microphone array<o:p><\/o:p><\/div>\r\n\r\n<div class=\"MsoListParagraphCxSpLast\" style=\"text-indent:-18.0pt;mso-list:l0 level1 lfo1\"><!--[if !supportLists]-->-<span style=\"font-style: normal; font-variant: normal; font-size-adjust: none; font-language-override: normal; font-kerning: auto; font-optical-sizing: auto; font-feature-settings: normal; font-variation-settings: normal; font-stretch: normal; font-size: 7pt; line-height: normal; font-family: \" times=\"\" new=\"\" roman\";\"=\"\"> \r\n<\/span><!--[endif]-->Single Ethernet connection to hub<\/div><div class=\"MsoListParagraphCxSpLast\" style=\"text-indent:-18.0pt;mso-list:l0 level1 lfo1\">Flexible horizontal or vertical installation<\/div><div class=\"MsoListParagraphCxSpLast\" style=\"text-indent:-18.0pt;mso-list:l0 level1 lfo1\"><span style=\"text-indent: 0px; font-size: 14px;\">- <span style=\"font-size: 14px;\">\ufeff<\/span><\/span><span style=\"text-indent: 0px; font-size: 14px; line-height: 107%; font-family: Calibri, sans-serif;\">Flexible horizontal or vertical installation<\/span><\/div><\/div><\/td><td><div><img src=\"..\/assets\/resources\/articles\/media-uploads\/media_6a565b54e53ed.png\" style=\"max-width: 100%;\"><br><\/div><\/td><\/tr><tr><td><div class=\"MsoNormal\"><b>Microphone Pod (option)<o:p><\/o:p><\/b><\/div>\r\n\r\n<div class=\"MsoNormal\">Spports Microphone Mist for improved full room coverage<o:p><\/o:p><\/div>\r\n\r\n<div class=\"MsoListParagraphCxSpFirst\" style=\"text-indent:-18.0pt;mso-list:l0 level1 lfo1\"><!--[if !supportLists]-->-<span style=\"font-style: normal; font-variant: normal; font-size-adjust: none; font-language-override: normal; font-kerning: auto; font-optical-sizing: auto; font-feature-settings: normal; font-variation-settings: normal; font-stretch: normal; font-size: 7pt; line-height: normal; font-family: \" times=\"\" new=\"\" roman\";\"=\"\"> \r\n<\/span><!--[endif]-->2 dimensional microphone array<o:p><\/o:p><\/div>\r\n\r\n<div class=\"MsoListParagraphCxSpMiddle\" style=\"text-indent:-18.0pt;mso-list:l0 level1 lfo1\"><!--[if !supportLists]-->-<span style=\"font-style: normal; font-variant: normal; font-size-adjust: none; font-language-override: normal; font-kerning: auto; font-optical-sizing: auto; font-feature-settings: normal; font-variation-settings: normal; font-stretch: normal; font-size: 7pt; line-height: normal; font-family: \" times=\"\" new=\"\" roman\";\"=\"\"> \r\n<\/span><!--[endif]-->Single Ethernet connection to hub<o:p><\/o:p><\/div>\r\n\r\n<div class=\"MsoListParagraphCxSpLast\" style=\"text-indent:-18.0pt;mso-list:l0 level1 lfo1\"><!--[if !supportLists]-->-<span style=\"font-style: normal; font-variant: normal; font-size-adjust: none; font-language-override: normal; font-kerning: auto; font-optical-sizing: auto; font-feature-settings: normal; font-variation-settings: normal; font-stretch: normal; font-size: 7pt; line-height: normal; font-family: \" times=\"\" new=\"\" roman\";\"=\"\"> \r\n<\/span><!--[endif]-->Flexible installation on wall or ceiling<o:p><\/o:p><\/div><\/td><td><div><img src=\"..\/assets\/resources\/articles\/media-uploads\/media_6a565b5a9f8a1.png\" style=\"max-width: 100%;\"><br><\/div><\/td><\/tr><\/tbody><\/table><div class=\"MsoNormal\"><o:p><br><\/o:p><\/div><h2>HDX Configurations<o:p><\/o:p><\/h2><div class=\"MsoNormal\">Prior to purchasing a HDX system consider the following<o:p><\/o:p><\/div><div class=\"MsoListParagraphCxSpFirst\" style=\"text-indent:-18.0pt;mso-list:l0 level1 lfo1\"><!--[if !supportLists]-->-<span style=\"font-style: normal; font-variant: normal; font-size-adjust: none; font-language-override: normal; font-kerning: auto; font-optical-sizing: auto; font-feature-settings: normal; font-variation-settings: normal; font-stretch: normal; font-size: 7pt; line-height: normal; font-family: \" times=\"\" new=\"\" roman\";\"=\"\"> \r\n<\/span><!--[endif]-->Room Dimensions \u2013 get accurate measurements of\r\nroom<o:p><\/o:p><\/div><div class=\"MsoListParagraphCxSpMiddle\" style=\"text-indent:-18.0pt;mso-list:l0 level1 lfo1\"><!--[if !supportLists]-->-<span style=\"font-style: normal; font-variant: normal; font-size-adjust: none; font-language-override: normal; font-kerning: auto; font-optical-sizing: auto; font-feature-settings: normal; font-variation-settings: normal; font-stretch: normal; font-size: 7pt; line-height: normal; font-family: \" times=\"\" new=\"\" roman\";\"=\"\"> \r\n<\/span><!--[endif]-->Active locations \u2013 note where people speak,\r\nseating & presenter areas and if there is a \u2018front of room\u2019<o:p><\/o:p><\/div><div class=\"MsoListParagraphCxSpMiddle\" style=\"text-indent:-18.0pt;mso-list:l0 level1 lfo1\"><!--[if !supportLists]-->-<span style=\"font-style: normal; font-variant: normal; font-size-adjust: none; font-language-override: normal; font-kerning: auto; font-optical-sizing: auto; font-feature-settings: normal; font-variation-settings: normal; font-stretch: normal; font-size: 7pt; line-height: normal; font-family: \" times=\"\" new=\"\" roman\";\"=\"\"> \r\n<\/span><!--[endif]-->Room environment \u2013 consider which physical\r\nlocations are best for HDX component placement<o:p><\/o:p><\/div><div class=\"MsoListParagraphCxSpLast\" style=\"text-indent:-18.0pt;mso-list:l0 level1 lfo1\"><!--[if !supportLists]-->-<span style=\"font-style: normal; font-variant: normal; font-size-adjust: none; font-language-override: normal; font-kerning: auto; font-optical-sizing: auto; font-feature-settings: normal; font-variation-settings: normal; font-stretch: normal; font-size: 7pt; line-height: normal; font-family: \" times=\"\" new=\"\" roman\";\"=\"\"> \r\n<\/span><!--[endif]-->Room acoustics \u2013 assess reverberation &\r\nbackground noise to determine best placement for HDX components.<o:p><\/o:p><\/div><div class=\"MsoNormal\">Coverage for each HDX configuration is based on the length\r\nof the longest wall. For rooms with a\r\nmore complex geometry, consider a larger configuration or add microphone pods\r\nto provide best coverage.<o:p><\/o:p><\/div><div class=\"MsoListParagraphCxSpFirst\" style=\"text-indent:-18.0pt;mso-list:l0 level1 lfo1\"><!--[if !supportLists]-->-<span style=\"font-style: normal; font-variant: normal; font-size-adjust: none; font-language-override: normal; font-kerning: auto; font-optical-sizing: auto; font-feature-settings: normal; font-variation-settings: normal; font-stretch: normal; font-size: 7pt; line-height: normal; font-family: \" times=\"\" new=\"\" roman\";\"=\"\"> \r\n<\/span><!--[endif]-->2 HDX Audio bars are suitable for rooms up to\r\n91.m in length<o:p><\/o:p><\/div><div class=\"MsoListParagraphCxSpMiddle\" style=\"text-indent:-18.0pt;mso-list:l0 level1 lfo1\"><!--[if !supportLists]-->-<span style=\"font-style: normal; font-variant: normal; font-size-adjust: none; font-language-override: normal; font-kerning: auto; font-optical-sizing: auto; font-feature-settings: normal; font-variation-settings: normal; font-stretch: normal; font-size: 7pt; line-height: normal; font-family: \" times=\"\" new=\"\" roman\";\"=\"\"> \r\n<\/span><!--[endif]-->4 HDX Audio bars are suitable for rooms up to\r\n18.3m in length<o:p><\/o:p><\/div><div class=\"MsoNormal\"><o:p>\r\n\r\n\r\n\r\n\r\n\r\n\r\n\r\n\r\n\r\n\r\n\r\n\r\n\r\n\r\n\r\n\r\n\r\n<\/o:p><\/div><div class=\"MsoListParagraphCxSpLast\" style=\"text-indent:-18.0pt;mso-list:l0 level1 lfo1\"><!--[if !supportLists]-->-<span style=\"font-style: normal; font-variant: normal; font-size-adjust: none; font-language-override: normal; font-kerning: auto; font-optical-sizing: auto; font-feature-settings: normal; font-variation-settings: normal; font-stretch: normal; font-size: 7pt; line-height: normal; font-family: \" times=\"\" new=\"\" roman\";\"=\"\"> \r\n<\/span><!--[endif]-->Microphone pods can be added to extend pickup\r\ncoverage and support Adaptive Voice Lift<\/div><div class=\"MsoListParagraphCxSpLast\" style=\"text-indent:-18.0pt;mso-list:l0 level1 lfo1\"><o:p><br><\/o:p><\/div><div class=\"MsoListParagraphCxSpLast\" style=\"text-indent:-18.0pt;mso-list:l0 level1 lfo1\"><img src=\"..\/assets\/resources\/articles\/media-uploads\/media_6a565c04dfd6e.png\" style=\"max-width: 100%;\"><o:p><br><\/o:p><\/div><h2><b><span style=\"font-size: 14px;\">HDX Placement Guidelines<\/span><\/b><\/h2><h2><b><span style=\"font-size: 14px;\"><br><\/span><o:p><\/o:p><\/b><\/h2><span style=\"font-size: 14px;\"><b>\r\n\r\n<\/b><\/span><div class=\"MsoNormal\">In order to provide best audio coverage in any given space,\r\nfollow these principles:<\/div><div class=\"MsoNormal\"><br><\/div><div class=\"MsoNormal\"><o:p><\/o:p><\/div><span style=\"font-size: 14px;\">\r\n\r\n<\/span><div class=\"MsoListParagraphCxSpFirst\" style=\"text-indent:-18.0pt;mso-list:l0 level1 lfo1\"><!--[if !supportLists]-->1.<span style=\"font-style: normal; font-variant: normal; font-size-adjust: none; font-language-override: normal; font-kerning: auto; font-optical-sizing: auto; font-feature-settings: normal; font-variation-settings: normal; font-stretch: normal; font-size: 7pt; line-height: normal; font-family: \" times=\"\" new=\"\" roman\";\"=\"\"> \r\n<\/span><!--[endif]-->Maintain a clear line of sight between audio\r\nbars & microphone pods. The system\r\nperforms best when they have a clear, unobstructed view of each other and the\r\nroom.<o:p><\/o:p><\/div><span style=\"font-size: 14px;\">\r\n\r\n<\/span><div class=\"MsoListParagraphCxSpMiddle\" style=\"text-indent:-18.0pt;mso-list:l0 level1 lfo1\"><!--[if !supportLists]-->2.<span style=\"font-style: normal; font-variant: normal; font-size-adjust: none; font-language-override: normal; font-kerning: auto; font-optical-sizing: auto; font-feature-settings: normal; font-variation-settings: normal; font-stretch: normal; font-size: 7pt; line-height: normal; font-family: \" times=\"\" new=\"\" roman\";\"=\"\"> \r\n<\/span><!--[endif]-->Avoid obstacles. \r\nAvoid placing components behind pillars, inside alcoves and in recessed\r\nareas.<o:p><\/o:p><\/div><span style=\"font-size: 14px;\">\r\n\r\n<\/span><div class=\"MsoListParagraphCxSpLast\" style=\"text-indent:-18.0pt;mso-list:l0 level1 lfo1\"><!--[if !supportLists]-->3.<span style=\"font-style: normal; font-variant: normal; font-size-adjust: none; font-language-override: normal; font-kerning: auto; font-optical-sizing: auto; font-feature-settings: normal; font-variation-settings: normal; font-stretch: normal; font-size: 7pt; line-height: normal; font-family: \" times=\"\" new=\"\" roman\";\"=\"\"> \r\n<\/span><!--[endif]-->Stay clear of noise sources. Position components away from HVAC vents,\r\nfans and other equipment that produces continuous background noise.<\/div><div class=\"MsoListParagraphCxSpLast\" style=\"text-indent:-18.0pt;mso-list:l0 level1 lfo1\"><o:p><br><\/o:p><\/div><div class=\"MsoListParagraphCxSpLast\" style=\"text-indent:-18.0pt;mso-list:l0 level1 lfo1\"><img src=\"..\/assets\/resources\/articles\/media-uploads\/media_6a565c7e6a0b6.png\" style=\"max-width: 100%;\"><o:p><b><br><\/b><\/o:p><\/div><h2>Audio Bar Placement<\/h2><div><br><\/div><h2><o:p><\/o:p><\/h2><div class=\"MsoNormal\">Audio bars can be mounted horizontally or vertically on the\r\nwall using the supplied mounting bracket, or on VESA standard mounting\r\nsolutions (display mounts, floor stands, mobile carts etc).<o:p><\/o:p><\/div><div class=\"MsoNormal\">Firstly, consider whether the space has a defined \u2018front of\r\nroom\u2019 as this is the natural focal point of a meeting or presentation where\r\naudience attention is focused.<\/div><div class=\"MsoNormal\"><o:p><br><\/o:p><\/div><div class=\"MsoNormal\"><o:p><br><\/o:p><\/div><h3>2 Audio Bar Solution<\/h3><div><br><\/div><h3><o:p><\/o:p><\/h3><div class=\"MsoListParagraphCxSpLast\" style=\"text-indent:-18.0pt;mso-list:l0 level1 lfo1\"><o:p>\r\n\r\n\r\n\r\n\r\n\r\n\r\n\r\n<\/o:p><\/div><div class=\"MsoNormal\">Ideally, for rooms with a defined front position, place 2\r\naudio bars along this wall, evenly distributed (\u00bc and \u00be points on along the wall) to provide\r\nbalanced audio for both presenters and audience.<\/div><div class=\"MsoNormal\"><o:p><br><\/o:p><\/div><div class=\"MsoNormal\"><img src=\"..\/assets\/resources\/articles\/media-uploads\/media_6a565ca97954c.png\" style=\"max-width: 100%;\"><o:p><br><\/o:p><\/div><div class=\"MsoNormal\"><o:p><\/o:p><\/div><div class=\"MsoNormal\">For spaces without a defined \u2018front of room\u2019, the optimal\r\npositioning should be on the same long wall.<\/div><div class=\"MsoNormal\"><o:p><br><\/o:p><\/div><div class=\"MsoNormal\"><img src=\"..\/assets\/resources\/articles\/media-uploads\/media_6a565cbc5dfff.png\" style=\"max-width: 100%;\"><o:p><br><\/o:p><\/div><div class=\"MsoNormal\"><o:p><\/o:p><\/div><div class=\"MsoNormal\">For more details, refer to HDX User Guide - <a href=\"https:\/\/www.nureva.com\/user-guide\/hdx\/placement\" target=\"_blank\">https:\/\/www.nureva.com\/user-guide\/hdx\/placement<\/a><a href=\"https:\/\/www.nureva.com\/user-guide\/hdx\/placement\"><\/a><\/div><div class=\"MsoNormal\"><br><\/div><h3>4 Audio Bar Solution<o:p><\/o:p><\/h3><div class=\"MsoNormal\">Use a balanced, symmetrical layout to provide consistent\r\ncoverage across the room.<o:p><\/o:p><\/div><div class=\"MsoNormal\">\r\n\r\n\r\n\r\n<o:p><\/o:p><\/div><div class=\"MsoNormal\">For spaces with a defined \u2018front of room\u2019, there are\r\nmultiple options for positioning.<\/div><div class=\"MsoNormal\"><img src=\"..\/assets\/resources\/articles\/media-uploads\/media_6a565cdc2ba14.png\" style=\"max-width: 100%;\"><img src=\"..\/assets\/resources\/articles\/media-uploads\/media_6a565cefb96c4.png\" style=\"max-width: 100%;\"><o:p><br><\/o:p><\/div><div class=\"MsoNormal\"><o:p><\/o:p><\/div><div class=\"MsoNormal\">For spaces without a \u2018front of room\u2019 the bars should be\r\npositioned evening along the long walls to provide consistent coverage.<\/div><div class=\"MsoNormal\"><img src=\"..\/assets\/resources\/articles\/media-uploads\/media_6a565d004726e.png\" style=\"max-width: 100%;\"><\/div><div class=\"MsoNormal\"><br><\/div><div class=\"MsoNormal\"><br><\/div><h3>Audio Bar Orientation<o:p><\/o:p><\/h3><div class=\"MsoNormal\">HDX Audio bars can be mounted vertically or horizontally.<o:p><\/o:p><\/div><div class=\"MsoListParagraphCxSpFirst\" style=\"text-indent:-18.0pt;mso-list:l0 level1 lfo1\"><!--[if !supportLists]-->-<span style=\"font-style: normal; font-variant: normal; font-size-adjust: none; font-language-override: normal; font-kerning: auto; font-optical-sizing: auto; font-feature-settings: normal; font-variation-settings: normal; font-stretch: normal; font-size: 7pt; line-height: normal; font-family: \" times=\"\" new=\"\" roman\";\"=\"\"> \r\n<\/span><!--[endif]-->Vertical orientation (default) \u2013 microphones are\r\npositioned in the upper half of the bar, to provide optimal localisation and\r\nclarity<o:p><\/o:p><\/div><div class=\"MsoNormal\"><o:p>\r\n\r\n\r\n\r\n\r\n\r\n<\/o:p><\/div><div class=\"MsoListParagraphCxSpLast\" style=\"text-indent:-18.0pt;mso-list:l0 level1 lfo1\"><!--[if !supportLists]-->-<span style=\"font-style: normal; font-variant: normal; font-size-adjust: none; font-language-override: normal; font-kerning: auto; font-optical-sizing: auto; font-feature-settings: normal; font-variation-settings: normal; font-stretch: normal; font-size: 7pt; line-height: normal; font-family: \" times=\"\" new=\"\" roman\";\"=\"\"> \r\n<\/span><!--[endif]-->Horizontal orientation \u2013 the speaker drivers\r\nneed to be positioned towards the outer edges of the room for even sound\r\ndistribution. This works best when\r\nworking around windows and other obstacles.<o:p><\/o:p><\/div><div class=\"MsoNormal\"><o:p><br><\/o:p><\/div><div class=\"MsoNormal\"><img src=\"..\/assets\/resources\/articles\/media-uploads\/media_6a565d1d8ea6c.png\" style=\"max-width: 100%;\"><img src=\"..\/assets\/resources\/articles\/media-uploads\/media_6a565d32d796a.png\" style=\"max-width: 100%;\"><\/div><div class=\"MsoNormal\"><br><\/div><table class=\"MsoTableGrid\" border=\"1\" cellspacing=\"0\" cellpadding=\"0\" style=\"border-width: medium; border-style: none; border-color: currentcolor; border-image: none;\">\r\n <tbody><tr>\r\n <td width=\"200\" valign=\"top\" style=\"width: 150.25pt; border-width: 1pt; border-color: windowtext; padding: 0cm 5.4pt;\">\r\n <div class=\"MsoNormal\" style=\"margin-bottom:0cm;line-height:normal\"><b style=\"\">Guideline<o:p><\/o:p><\/b><\/div>\r\n <\/td>\r\n <td width=\"121\" valign=\"top\" style=\"width: 90.5pt; border-width: 1pt 1pt 1pt medium; border-style: solid solid solid none; border-color: windowtext windowtext windowtext currentcolor; padding: 0cm 5.4pt;\">\r\n <div class=\"MsoNormal\" style=\"margin-bottom:0cm;line-height:normal\"><b style=\"\">Measurement<o:p><\/o:p><\/b><\/div>\r\n <\/td>\r\n <td width=\"280\" valign=\"top\" style=\"width: 210.05pt; border-width: 1pt 1pt 1pt medium; border-style: solid solid solid none; border-color: windowtext windowtext windowtext currentcolor; padding: 0cm 5.4pt;\">\r\n <div class=\"MsoNormal\" style=\"margin-bottom:0cm;line-height:normal\"><b>Why this\r\n helps<o:p><\/o:p><\/b><\/div>\r\n <\/td>\r\n <\/tr>\r\n <tr>\r\n <td width=\"200\" valign=\"top\" style=\"width: 150.25pt; border-width: medium 1pt 1pt; border-style: none solid solid; border-color: currentcolor windowtext windowtext; padding: 0cm 5.4pt;\">\r\n <div class=\"MsoNormal\" style=\"margin-bottom:0cm;line-height:normal\">Suggested\r\n height from floor<o:p><\/o:p><\/div>\r\n <\/td>\r\n <td width=\"121\" valign=\"top\" style=\"width:90.5pt;border-top:none;border-left:\r\n none;border-bottom:solid windowtext 1.0pt;border-right:solid windowtext 1.0pt;\r\n mso-border-top-alt:solid windowtext .5pt;mso-border-left-alt:solid windowtext .5pt;\r\n mso-border-alt:solid windowtext .5pt;padding:0cm 5.4pt 0cm 5.4pt\">\r\n <div class=\"MsoNormal\" style=\"margin-bottom:0cm;line-height:normal\">91 \u2013 366cm<o:p><\/o:p><\/div>\r\n <\/td>\r\n <td width=\"280\" valign=\"top\" style=\"width:210.05pt;border-top:none;border-left:\r\n none;border-bottom:solid windowtext 1.0pt;border-right:solid windowtext 1.0pt;\r\n mso-border-top-alt:solid windowtext .5pt;mso-border-left-alt:solid windowtext .5pt;\r\n mso-border-alt:solid windowtext .5pt;padding:0cm 5.4pt 0cm 5.4pt\">\r\n <div class=\"MsoNormal\" style=\"margin-bottom:0cm;line-height:normal\">Audio bars\r\n being placed at or above head level will help direct sound towards listeners\r\n and improve microphone pickup. Maintain minimum clearance of 8cm above the audio bars for wall mount\r\n installation and service<o:p><\/o:p><\/div>\r\n <div class=\"MsoNormal\" style=\"margin-bottom:0cm;line-height:normal\"><o:p> <\/o:p><\/div>\r\n <\/td>\r\n <\/tr>\r\n <tr>\r\n <td width=\"200\" valign=\"top\" style=\"width: 150.25pt; border-width: medium 1pt 1pt; border-style: none solid solid; border-color: currentcolor windowtext windowtext; padding: 0cm 5.4pt;\">\r\n <div class=\"MsoNormal\" style=\"margin-bottom:0cm;line-height:normal\">Minimum distance\r\n from adjacent wall or corner<o:p><\/o:p><\/div>\r\n <\/td>\r\n <td width=\"121\" valign=\"top\" style=\"width:90.5pt;border-top:none;border-left:\r\n none;border-bottom:solid windowtext 1.0pt;border-right:solid windowtext 1.0pt;\r\n mso-border-top-alt:solid windowtext .5pt;mso-border-left-alt:solid windowtext .5pt;\r\n mso-border-alt:solid windowtext .5pt;padding:0cm 5.4pt 0cm 5.4pt\">\r\n <div class=\"MsoNormal\" style=\"margin-bottom:0cm;line-height:normal\">30cm<o:p><\/o:p><\/div>\r\n <\/td>\r\n <td width=\"280\" valign=\"top\" style=\"width:210.05pt;border-top:none;border-left:\r\n none;border-bottom:solid windowtext 1.0pt;border-right:solid windowtext 1.0pt;\r\n mso-border-top-alt:solid windowtext .5pt;mso-border-left-alt:solid windowtext .5pt;\r\n mso-border-alt:solid windowtext .5pt;padding:0cm 5.4pt 0cm 5.4pt\">\r\n <div class=\"MsoNormal\" style=\"margin-bottom:0cm;line-height:normal\">Avoide\r\n placing audio bars on walls close to corners to reduce echo. If corner placement is required, angle the\r\n audio bars to face into the room using a VESA standard mounting solution (not\r\n provided).<o:p><\/o:p><\/div>\r\n <\/td>\r\n <\/tr>\r\n <tr>\r\n <td width=\"200\" valign=\"top\" style=\"width: 150.25pt; border-width: medium 1pt 1pt; border-style: none solid solid; border-color: currentcolor windowtext windowtext; padding: 0cm 5.4pt;\">\r\n <div class=\"MsoNormal\" style=\"margin-bottom:0cm;line-height:normal\">Minimum\r\n spacing between audio bars<o:p><\/o:p><\/div>\r\n <\/td>\r\n <td width=\"121\" valign=\"top\" style=\"width:90.5pt;border-top:none;border-left:\r\n none;border-bottom:solid windowtext 1.0pt;border-right:solid windowtext 1.0pt;\r\n mso-border-top-alt:solid windowtext .5pt;mso-border-left-alt:solid windowtext .5pt;\r\n mso-border-alt:solid windowtext .5pt;padding:0cm 5.4pt 0cm 5.4pt\">\r\n <div class=\"MsoNormal\" style=\"margin-bottom:0cm;line-height:normal\">152cm<o:p><\/o:p><\/div>\r\n <\/td>\r\n <td width=\"280\" valign=\"top\" style=\"width:210.05pt;border-top:none;border-left:\r\n none;border-bottom:solid windowtext 1.0pt;border-right:solid windowtext 1.0pt;\r\n mso-border-top-alt:solid windowtext .5pt;mso-border-left-alt:solid windowtext .5pt;\r\n mso-border-alt:solid windowtext .5pt;padding:0cm 5.4pt 0cm 5.4pt\">\r\n <div class=\"MsoNormal\" style=\"margin-bottom:0cm;line-height:normal\">Adequate\r\n space between the audio bars helps prevent them playing directly into other\r\n components, reducing echo and supporting consistent performance<o:p><\/o:p><\/div>\r\n <\/td>\r\n <\/tr>\r\n<\/tbody><\/table><div class=\"MsoNormal\"><br><\/div><h2>Microphone Pod Placement<\/h2><h2><o:p><br><\/o:p><\/h2><h2>One or two microphone pods may be mounted on the ceiling,\r\nwall or VESA standard mounts, depending on room layout, furniture arrangement\r\nand location of primary talker.<\/h2><div class=\"MsoNormal\">The below layouts demonstrate different placement examples\r\nbut microphone placement is flexible depending on the use case.<o:p><\/o:p><\/div><div class=\"MsoNormal\">\r\n\r\n\r\n\r\n\r\n\r\n<\/div><h3><br><\/h3><h3>Examples \u2013 1 microphone pod<\/h3><div><br><\/div><h3><img src=\"..\/assets\/resources\/articles\/media-uploads\/media_6a565dbecd13d.png\" style=\"max-width: 100%;\"><o:p><br><\/o:p><\/h3><h3><o:p><\/o:p><\/h3><h3>Examples \u2013 2 microphones pods<\/h3><div><br><\/div><h3><img src=\"..\/assets\/resources\/articles\/media-uploads\/media_6a565dd1c0637.png\" style=\"max-width: 100%;\"><o:p><br><\/o:p><\/h3><h3>Microphone Pod installation<o:p><\/o:p><\/h3><h3>\r\n\r\n<span style=\"font-size:11.0pt;line-height:107%;font-family:\" calibri\",sans-serif;=\"\" mso-ascii-theme-font:minor-latin;mso-fareast-font-family:calibri;mso-fareast-theme-font:=\"\" minor-latin;mso-hansi-theme-font:minor-latin;mso-bidi-font-family:arial;=\"\" mso-bidi-theme-font:minor-bidi;mso-ansi-language:en-gb;mso-fareast-language:=\"\" en-us;mso-bidi-language:ar-sa\"=\"\">Installation is very flexible. The supplied bracket supports any orientation is supported except for\r\nupside down on a wall.<\/span><\/h3><h3><img src=\"..\/assets\/resources\/articles\/media-uploads\/media_6a565de39b11b.png\" style=\"max-width: 100%;\"><span style=\"font-size:11.0pt;line-height:107%;font-family:\" calibri\",sans-serif;=\"\" mso-ascii-theme-font:minor-latin;mso-fareast-font-family:calibri;mso-fareast-theme-font:=\"\" minor-latin;mso-hansi-theme-font:minor-latin;mso-bidi-font-family:arial;=\"\" mso-bidi-theme-font:minor-bidi;mso-ansi-language:en-gb;mso-fareast-language:=\"\" en-us;mso-bidi-language:ar-sa\"=\"\"><br><\/span><\/h3><h3><span style=\"font-size:11.0pt;line-height:107%;font-family:\" calibri\",sans-serif;=\"\" mso-ascii-theme-font:minor-latin;mso-fareast-font-family:calibri;mso-fareast-theme-font:=\"\" minor-latin;mso-hansi-theme-font:minor-latin;mso-bidi-font-family:arial;=\"\" mso-bidi-theme-font:minor-bidi;mso-ansi-language:en-gb;mso-fareast-language:=\"\" en-us;mso-bidi-language:ar-sa\"=\"\"><\/span><\/h3><h3>Microphone Pod Mounting Guidelines<\/h3><h3><img src=\"..\/assets\/resources\/articles\/media-uploads\/media_6a565df084e51.png\" style=\"max-width: 100%;\"><o:p><br><\/o:p><\/h3><h3><o:p><table class=\"MsoTableGrid\" border=\"1\" cellspacing=\"0\" cellpadding=\"0\" style=\"border-width: medium; border-style: none; border-color: currentcolor; border-image: none;\">\r\n <tbody><tr>\r\n <td width=\"200\" valign=\"top\" style=\"width: 150.25pt; border-width: 1pt; border-color: windowtext; padding: 0cm 5.4pt;\">\r\n <div class=\"MsoNormal\" style=\"margin-bottom:0cm;line-height:normal\"><b>Guideline<o:p><\/o:p><\/b><\/div>\r\n <\/td>\r\n <td width=\"121\" valign=\"top\" style=\"width: 90.5pt; border-width: 1pt 1pt 1pt medium; border-style: solid solid solid none; border-color: windowtext windowtext windowtext currentcolor; padding: 0cm 5.4pt;\">\r\n <div class=\"MsoNormal\" style=\"margin-bottom:0cm;line-height:normal\"><b>Measurement<o:p><\/o:p><\/b><\/div>\r\n <\/td>\r\n <td width=\"280\" valign=\"top\" style=\"width: 210.05pt; border-width: 1pt 1pt 1pt medium; border-style: solid solid solid none; border-color: windowtext windowtext windowtext currentcolor; padding: 0cm 5.4pt;\">\r\n <div class=\"MsoNormal\" style=\"margin-bottom:0cm;line-height:normal\"><b>Why this\r\n helps<o:p><\/o:p><\/b><\/div>\r\n <\/td>\r\n <\/tr>\r\n <tr>\r\n <td width=\"200\" valign=\"top\" style=\"width: 150.25pt; border-width: medium 1pt 1pt; border-style: none solid solid; border-color: currentcolor windowtext windowtext; padding: 0cm 5.4pt;\">\r\n <div class=\"MsoNormal\" style=\"margin-bottom:0cm;line-height:normal\">Typical\r\n ceiling-mounted height<o:p><\/o:p><\/div>\r\n <\/td>\r\n <td width=\"121\" valign=\"top\" style=\"width:90.5pt;border-top:none;border-left:\r\n none;border-bottom:solid windowtext 1.0pt;border-right:solid windowtext 1.0pt;\r\n mso-border-top-alt:solid windowtext .5pt;mso-border-left-alt:solid windowtext .5pt;\r\n mso-border-alt:solid windowtext .5pt;padding:0cm 5.4pt 0cm 5.4pt\">\r\n <div class=\"MsoNormal\" style=\"margin-bottom:0cm;line-height:normal\">244 to366cm<o:p><\/o:p><\/div>\r\n <\/td>\r\n <td width=\"280\" valign=\"top\" style=\"width:210.05pt;border-top:none;border-left:\r\n none;border-bottom:solid windowtext 1.0pt;border-right:solid windowtext 1.0pt;\r\n mso-border-top-alt:solid windowtext .5pt;mso-border-left-alt:solid windowtext .5pt;\r\n mso-border-alt:solid windowtext .5pt;padding:0cm 5.4pt 0cm 5.4pt\">\r\n <div class=\"MsoNormal\" style=\"margin-bottom:0cm;line-height:normal\">The coverage\r\n and sensitivity of the microphones are balanced, helping capture voices\r\n clearly<o:p><\/o:p><\/div>\r\n <\/td>\r\n <\/tr>\r\n <tr>\r\n <td width=\"200\" valign=\"top\" style=\"width: 150.25pt; border-width: medium 1pt 1pt; border-style: none solid solid; border-color: currentcolor windowtext windowtext; padding: 0cm 5.4pt;\">\r\n <div class=\"MsoNormal\" style=\"margin-bottom:0cm;line-height:normal\">Minimum wall\r\n mount height<o:p><\/o:p><\/div>\r\n <\/td>\r\n <td width=\"121\" valign=\"top\" style=\"width:90.5pt;border-top:none;border-left:\r\n none;border-bottom:solid windowtext 1.0pt;border-right:solid windowtext 1.0pt;\r\n mso-border-top-alt:solid windowtext .5pt;mso-border-left-alt:solid windowtext .5pt;\r\n mso-border-alt:solid windowtext .5pt;padding:0cm 5.4pt 0cm 5.4pt\">\r\n <div class=\"MsoNormal\" style=\"margin-bottom:0cm;line-height:normal\">91cm<o:p><\/o:p><\/div>\r\n <\/td>\r\n <td width=\"280\" valign=\"top\" style=\"width:210.05pt;border-top:none;border-left:\r\n none;border-bottom:solid windowtext 1.0pt;border-right:solid windowtext 1.0pt;\r\n mso-border-top-alt:solid windowtext .5pt;mso-border-left-alt:solid windowtext .5pt;\r\n mso-border-alt:solid windowtext .5pt;padding:0cm 5.4pt 0cm 5.4pt\">\r\n <div class=\"MsoNormal\" style=\"margin-bottom:0cm;line-height:normal\">The placement\r\n of microphone pods above seated height helps maintain clear pickup.<o:p><\/o:p><\/div>\r\n <\/td>\r\n <\/tr>\r\n <tr>\r\n <td width=\"200\" valign=\"top\" style=\"width: 150.25pt; border-width: medium 1pt 1pt; border-style: none solid solid; border-color: currentcolor windowtext windowtext; padding: 0cm 5.4pt;\">\r\n <div class=\"MsoNormal\" style=\"margin-bottom:0cm;line-height:normal\">Minimum\r\n spacing from audio bars<o:p><\/o:p><\/div>\r\n <\/td>\r\n <td width=\"121\" valign=\"top\" style=\"width:90.5pt;border-top:none;border-left:\r\n none;border-bottom:solid windowtext 1.0pt;border-right:solid windowtext 1.0pt;\r\n mso-border-top-alt:solid windowtext .5pt;mso-border-left-alt:solid windowtext .5pt;\r\n mso-border-alt:solid windowtext .5pt;padding:0cm 5.4pt 0cm 5.4pt\">\r\n <div class=\"MsoNormal\" style=\"margin-bottom:0cm;line-height:normal\">152cm<o:p><\/o:p><\/div>\r\n <\/td>\r\n <td width=\"280\" valign=\"top\" style=\"width:210.05pt;border-top:none;border-left:\r\n none;border-bottom:solid windowtext 1.0pt;border-right:solid windowtext 1.0pt;\r\n mso-border-top-alt:solid windowtext .5pt;mso-border-left-alt:solid windowtext .5pt;\r\n mso-border-alt:solid windowtext .5pt;padding:0cm 5.4pt 0cm 5.4pt\">\r\n <div class=\"MsoNormal\" style=\"margin-bottom:0cm;line-height:normal\">Adequate\r\n spacing between microphone pods and audio bars ensures speakers and\r\n microphones are not facing directly towards each other, reducing echo and\r\n supporting features such as Adaptive Voice Amplification and Adaptive Voice\r\n Lift<o:p><\/o:p><\/div>\r\n <\/td>\r\n <\/tr>\r\n<\/tbody><\/table><\/o:p><\/h3><h3><o:p><br><\/o:p><\/h3><h2>System Hub Positioning<o:p><\/o:p><\/h2><h3><o:p>\r\n\r\n<div class=\"MsoNormal\">The HDX system hub can be placed on a table, shelf or rack,\r\nor wall mounted. Regardless of\r\nplacement, ensure adequate ventilation an an unobstructed Bluetooth connection.<\/div><div class=\"MsoNormal\"><o:p><br><\/o:p><\/div><div class=\"MsoNormal\"><img src=\"..\/assets\/resources\/articles\/media-uploads\/media_6a565e0d47e37.png\" style=\"max-width: 100%;\"><o:p><br><\/o:p><\/div><\/o:p><\/h3><div class=\"MsoNormal\">For optimal placement consider<o:p><\/o:p><\/div><span style=\"font-size: 14px;\">\r\n\r\n<\/span><div class=\"MsoListParagraphCxSpFirst\" style=\"text-indent:-18.0pt;mso-list:l0 level1 lfo1\"><!--[if !supportLists]-->-<span style=\"font-style: normal; font-variant: normal; font-size-adjust: none; font-language-override: normal; font-kerning: auto; font-optical-sizing: auto; font-feature-settings: normal; font-variation-settings: normal; font-stretch: normal; font-size: 7pt; line-height: normal; font-family: \" times=\"\" new=\"\" roman\";\"=\"\"> \r\n<\/span><!--[endif]-->Side ventilation: allow at least 56mm of\r\nclearance<o:p><\/o:p><\/div><span style=\"font-size: 14px;\">\r\n\r\n<\/span><div class=\"MsoListParagraphCxSpMiddle\" style=\"text-indent:-18.0pt;mso-list:l0 level1 lfo1\"><!--[if !supportLists]-->-<span style=\"font-style: normal; font-variant: normal; font-size-adjust: none; font-language-override: normal; font-kerning: auto; font-optical-sizing: auto; font-feature-settings: normal; font-variation-settings: normal; font-stretch: normal; font-size: 7pt; line-height: normal; font-family: \" times=\"\" new=\"\" roman\";\"=\"\"> \r\n<\/span><!--[endif]-->Top ventilation: allow at least 86mm of\r\nclearance above<o:p><\/o:p><\/div><span style=\"font-size: 14px;\">\r\n\r\n<\/span><div class=\"MsoListParagraphCxSpMiddle\" style=\"text-indent:-18.0pt;mso-list:l0 level1 lfo1\"><!--[if !supportLists]-->-<span style=\"font-style: normal; font-variant: normal; font-size-adjust: none; font-language-override: normal; font-kerning: auto; font-optical-sizing: auto; font-feature-settings: normal; font-variation-settings: normal; font-stretch: normal; font-size: 7pt; line-height: normal; font-family: \" times=\"\" new=\"\" roman\";\"=\"\"> \r\n<\/span><!--[endif]-->Heat considerations: do not install the system\r\nhub near other devices that generate heat. \r\nAmbient temperature must remain below 40<span style=\"font-family:Symbol;\r\nmso-ascii-font-family:Calibri;mso-ascii-theme-font:minor-latin;mso-hansi-font-family:\r\nCalibri;mso-hansi-theme-font:minor-latin;mso-char-type:symbol;mso-symbol-font-family:\r\nSymbol\">\u00b0<\/span>C<o:p><\/o:p><\/div><span style=\"font-size: 14px;\">\r\n\r\n<\/span><div class=\"MsoListParagraphCxSpMiddle\" style=\"text-indent:-18.0pt;mso-list:l0 level1 lfo1\"><!--[if !supportLists]-->-<span style=\"font-style: normal; font-variant: normal; font-size-adjust: none; font-language-override: normal; font-kerning: auto; font-optical-sizing: auto; font-feature-settings: normal; font-variation-settings: normal; font-stretch: normal; font-size: 7pt; line-height: normal; font-family: \" times=\"\" new=\"\" roman\";\"=\"\"> \r\n<\/span><!--[endif]-->Bluetooth antenna: ensure it is upright for best\r\nsignal strength. Antenna extender are\r\nnot recommended.<o:p><\/o:p><\/div><span style=\"font-size: 14px;\">\r\n\r\n<\/span><div class=\"MsoListParagraphCxSpLast\" style=\"text-indent:-18.0pt;mso-list:l0 level1 lfo1\"><!--[if !supportLists]-->-<span style=\"font-style: normal; font-variant: normal; font-size-adjust: none; font-language-override: normal; font-kerning: auto; font-optical-sizing: auto; font-feature-settings: normal; font-variation-settings: normal; font-stretch: normal; font-size: 7pt; line-height: normal; font-family: \" times=\"\" new=\"\" roman\";\"=\"\"> \r\n<\/span><!--[endif]-->Password and enrolment code are located on the\r\nbase of the system hub. Make a note of\r\nthese prior to final installation of the hub as they will be needed to enrol\r\nsystem into Console.<\/div><div class=\"MsoListParagraphCxSpLast\" style=\"text-indent:-18.0pt;mso-list:l0 level1 lfo1\"><o:p><br><\/o:p><\/div><div class=\"MsoListParagraphCxSpLast\" style=\"text-indent:-18.0pt;mso-list:l0 level1 lfo1\"><img src=\"..\/assets\/resources\/articles\/media-uploads\/media_6a565e1d57641.png\" style=\"max-width: 100%;\"><o:p><br><\/o:p><\/div><div style=\"mso-element:para-border-div;border:none;border-top:solid windowtext 1.0pt;\r\nmso-border-top-alt:solid windowtext .5pt;padding:1.0pt 0cm 0cm 0cm\">\r\n\r\n<h2 style=\"border:none;mso-border-top-alt:solid windowtext .5pt;padding:0cm;\r\nmso-padding-alt:1.0pt 0cm 0cm 0cm\">If in doubt, Ask Ascentae<o:p><\/o:p><\/h2>\r\n\r\n<\/div><div class=\"MsoListParagraphCxSpLast\" style=\"text-indent:-18.0pt;mso-list:l0 level1 lfo1\"><o:p>\r\n\r\n<\/o:p><\/div><div class=\"MsoNormal\">We are here to help. If you have any questions or concerns about a\r\nsolution, please contact the support team \r\n- <a href=\"mailto:support@ascentae.com\">support@ascentae.com<\/a>.<o:p><\/o:p><\/div>","author_id":5,"category_id":7,"status":"published","created_at":"2026-07-14 16:04:00","updated_at":"2026-07-19 10:02:13","username":"nick","first_name":"Nick","last_name":"Palmer","profile_photo":"assets\/user\/profile\/1788702782_nick (1).png","cat_name":"Pre-Sales","search_score":47},{"id":30,"title":"Nureva HDL410 \u2013 Best Practice for Camera Integration Direct Integration","content":"<div style=\"color: rgb(51, 51, 51); font-family: Helvetica; font-size: 14px; border-bottom-width: 1pt; border-bottom-color: rgb(68, 114, 196); border-top-width: 1pt; border-top-color: rgb(68, 114, 196); border-left: none; border-right: none; padding: 10pt 0cm; margin-left: 58px; margin-right: 58px;\"><p class=\"MsoIntenseQuote\" style=\"margin-top: 24px; margin-bottom: 24px; line-height: 19.6px; letter-spacing: 0.5px; border: none; text-align: center; padding: 0cm;\"><span style=\"font-size: 11pt;\"><span style=\"line-height: 15.6933px;\"><span style=\"font-family: Calibri, sans-serif;\"><span style=\"color: rgb(68, 114, 196);\"><span style=\"font-style: italic;\"><span style=\"font-size: 14pt;\"><span style=\"line-height: 19.9733px;\"><span style=\"font-style: normal;\"><b>Nureva HDL410 \u2013 Best Practice for Camera Integration<br>Direct Integration<\/b><\/span><\/span><\/span><\/span><\/span><\/span><\/span><\/span><\/p><\/div><p style=\"margin-bottom: 11px; line-height: 19.6px; letter-spacing: 0.5px; color: rgb(51, 51, 51); font-family: Helvetica; font-size: 14px;\"> <\/p><p style=\"margin-bottom: 11px; line-height: 19.6px; letter-spacing: 0.5px; color: rgb(51, 51, 51); font-family: Helvetica; font-size: 14px;\"><span style=\"font-size: 12pt;\"><span style=\"font-family: "Times New Roman", serif;\"><span style=\"font-size: 11pt;\"><span style=\"font-family: Calibri, sans-serif;\">Before installing a camera steering and switching solution to integrate with your Nureva audio solution, we recommend you refer to the below information and important links.<\/span><\/span><\/span><\/span><\/p><div style=\"color: rgb(51, 51, 51); font-family: Helvetica; font-size: 14px; border-bottom-width: 1pt; border-bottom-color: windowtext; padding: 0cm 0cm 1pt;\"><p style=\"margin-bottom: 11px; line-height: 19.6px; letter-spacing: 0.5px; border: none; padding: 0cm;\"><span style=\"font-size: 11pt;\"><span style=\"line-height: 15.6933px;\"><span style=\"font-family: Calibri, sans-serif;\">You can find comprehensive instructions on installing and configuring a Nureva \/ camera solution on the Nureva Support site.<\/span><\/span><\/span><\/p><p style=\"margin-bottom: 11px; line-height: 19.6px; letter-spacing: 0.5px; border: none; padding: 0cm;\"><span style=\"font-size: 11pt;\"><span style=\"line-height: 15.6933px;\"><span style=\"font-family: Calibri, sans-serif;\">This article gives guidance you may not find online, plus some Top Tips that we have picked up.<\/span><\/span><\/span><\/p><\/div><h2 style=\"font-family: Helvetica; line-height: 1.1; color: rgb(51, 51, 51); margin-top: 3px; margin-bottom: 10px; font-size: 24px;\"><span style=\"font-size: 13pt;\"><span style=\"line-height: 18.5467px;\"><span style=\"font-family: "Calibri Light", sans-serif;\"><span style=\"color: rgb(47, 84, 150);\"><b>Understand the customer requirements<\/b><\/span><\/span><\/span><\/span><\/h2><p style=\"margin-bottom: 11px; line-height: 19.6px; letter-spacing: 0.5px; color: rgb(51, 51, 51); font-family: Helvetica; font-size: 14px;\"><span style=\"font-size: 11pt;\"><span style=\"line-height: 15.6933px;\"><span style=\"font-family: Calibri, sans-serif;\">Nureva can support both camera steering (tracking\/switching presets), and camera switching (changing to different cameras).<\/span><\/span><\/span><\/p><p style=\"margin-bottom: 11px; line-height: 19.6px; letter-spacing: 0.5px; color: rgb(51, 51, 51); font-family: Helvetica; font-size: 14px;\"><span style=\"font-size: 11pt;\"><span style=\"line-height: 15.6933px;\"><span style=\"font-family: Calibri, sans-serif;\">It is important to have a view of the customers room, and understand which areas of the room need to be covered by a camera. From this, you can determine the number of cameras required and the fields of view.<\/span><\/span><\/span><\/p><p style=\"margin-bottom: 11px; line-height: 19.6px; letter-spacing: 0.5px; color: rgb(51, 51, 51); font-family: Helvetica; font-size: 14px;\"><span style=\"font-size: 11pt;\"><span style=\"line-height: 15.6933px;\"><span style=\"font-family: Calibri, sans-serif;\">If you have any queries about this, please contact Ascentae for advice. We can even offer a full pre-installation consultancy service to help with this.<\/span><\/span><\/span><\/p><h2 style=\"font-family: Helvetica; line-height: 1.1; color: rgb(51, 51, 51); margin-top: 3px; margin-bottom: 10px; font-size: 24px;\"><span style=\"font-size: 13pt;\"><span style=\"line-height: 18.5467px;\"><span style=\"font-family: "Calibri Light", sans-serif;\"><span style=\"color: rgb(47, 84, 150);\"><b>Understand the limitations of the technology \u2013 HDL300 \/ HDL310<\/b><\/span><\/span><\/span><\/span><\/h2><p style=\"margin-bottom: 11px; margin-left: 80px; line-height: 19.6px; letter-spacing: 0.5px; color: rgb(51, 51, 51); font-family: Helvetica; font-size: 14px;\"><img class=\"img-responsive\" height=\"282\" src=\"https:\/\/ascentae.magentrixcloud.com\/sys\/staticasset\/read\/file-if39823f0cf8207a1.png\" width=\"486\" style=\"border-style: none; border-color: initial; border-image: initial; float: left;\"><\/p><p style=\"margin-bottom: 11px; line-height: 19.6px; letter-spacing: 0.5px; color: rgb(51, 51, 51); font-family: Helvetica; font-size: 14px;\"> <\/p><p style=\"margin-bottom: 11px; line-height: 19.6px; letter-spacing: 0.5px; color: rgb(51, 51, 51); font-family: Helvetica; font-size: 14px;\"> <\/p><p style=\"margin-bottom: 11px; line-height: 19.6px; letter-spacing: 0.5px; color: rgb(51, 51, 51); font-family: Helvetica; font-size: 14px;\"> <\/p><p style=\"margin-bottom: 11px; line-height: 19.6px; letter-spacing: 0.5px; color: rgb(51, 51, 51); font-family: Helvetica; font-size: 14px;\"> <\/p><p style=\"margin-bottom: 11px; line-height: 19.6px; letter-spacing: 0.5px; color: rgb(51, 51, 51); font-family: Helvetica; font-size: 14px;\"> <\/p><p style=\"margin-bottom: 11px; line-height: 19.6px; letter-spacing: 0.5px; color: rgb(51, 51, 51); font-family: Helvetica; font-size: 14px;\"> <\/p><p style=\"margin-bottom: 11px; line-height: 19.6px; letter-spacing: 0.5px; color: rgb(51, 51, 51); font-family: Helvetica; font-size: 14px;\"> <\/p><p style=\"margin-bottom: 11px; line-height: 19.6px; letter-spacing: 0.5px; color: rgb(51, 51, 51); font-family: Helvetica; font-size: 14px;\"> <\/p><p style=\"margin-bottom: 11px; line-height: 19.6px; letter-spacing: 0.5px; color: rgb(51, 51, 51); font-family: Helvetica; font-size: 14px;\"> <\/p><p style=\"margin-bottom: 11px; line-height: 19.6px; letter-spacing: 0.5px; color: rgb(51, 51, 51); font-family: Helvetica; font-size: 14px;\"><span style=\"font-size: 11pt;\"><span style=\"line-height: 15.6933px;\"><span style=\"font-family: Calibri, sans-serif;\">When integrating with a HDL300 or HDL310, you have a single sound bar \u2013 and so only one point of reference. The information passed to the camera controller is based on the central point of the sound bar. This makes it an ideal solution for azimuth presets, with a single camera mounted in line with the centre of the sound bar.<\/span><\/span><\/span><\/p><p style=\"margin-bottom: 11px; line-height: 19.6px; letter-spacing: 0.5px; color: rgb(51, 51, 51); font-family: Helvetica; font-size: 14px;\"><span style=\"font-size: 11pt;\"><span style=\"line-height: 15.6933px;\"><span style=\"font-family: Calibri, sans-serif;\">Typically, up to 8 presets can be configured, each covering 22.5\u00b0 of the room.<\/span><\/span><\/span><\/p><p style=\"margin-bottom: 11px; line-height: 19.6px; letter-spacing: 0.5px; color: rgb(51, 51, 51); font-family: Helvetica; font-size: 14px;\"><span style=\"font-size: 11pt;\"><span style=\"line-height: 15.6933px;\"><span style=\"font-family: Calibri, sans-serif;\">The same is true if you have the legacy Dual HDL300 system. The reference point for camera tracking will be the centre point of the primary sound bar (plugged into port 1 on the Connect Module). The 2<span style=\"font-size: 11px; line-height: 0; position: relative; vertical-align: baseline; top: -0.5em;\">nd<\/span> sound bar is not used for camera tracking).<\/span><\/span><\/span><\/p><p style=\"margin-bottom: 11px; line-height: 19.6px; letter-spacing: 0.5px; color: rgb(51, 51, 51); font-family: Helvetica; font-size: 14px;\"><span style=\"font-size: 11pt;\"><span style=\"line-height: 15.6933px;\"><span style=\"font-family: Calibri, sans-serif;\">If using more than one camera, the best position for the cameras is either side of the sound bar, each covering half the room and using 4 presets.<\/span><\/span><\/span><\/p><h2 style=\"font-family: Helvetica; line-height: 1.1; color: rgb(51, 51, 51); margin-top: 3px; margin-bottom: 10px; font-size: 24px;\"><span style=\"font-size: 13pt;\"><span style=\"line-height: 18.5467px;\"><span style=\"font-family: "Calibri Light", sans-serif;\"><span style=\"color: rgb(47, 84, 150);\"><b>Understand the limitations of the technology \u2013 HDL300 \/ HDL310<\/b><\/span><\/span><\/span><\/span><\/h2><p style=\"margin-bottom: 11px; line-height: 19.6px; letter-spacing: 0.5px; color: rgb(51, 51, 51); font-family: Helvetica; font-size: 14px;\"><img class=\"img-responsive\" height=\"499\" src=\"https:\/\/ascentae.magentrixcloud.com\/sys\/staticasset\/read\/file-i74dcec536a8eb7e0.png\" width=\"814\" style=\"border-style: none; border-color: initial; border-image: initial; height: 386px; width: 629px;\"><\/p><p style=\"margin-bottom: 11px; line-height: 19.6px; letter-spacing: 0.5px; color: rgb(51, 51, 51); font-family: Helvetica; font-size: 14px;\"><span style=\"font-size: 11pt;\"><span style=\"line-height: 15.6933px;\"><span style=\"font-family: Calibri, sans-serif;\">The HDL410 has 2 sound bars and when correctly positioned in the room, they can deliver accurate X,Y coordinate information to the camera controller. Depending on the sophistication of the camera controller, it can interpret those coordinates in different ways.<\/span><\/span><\/span><\/p><p style=\"margin-bottom: 11px; line-height: 19.6px; letter-spacing: 0.5px; color: rgb(51, 51, 51); font-family: Helvetica; font-size: 14px;\"><span style=\"font-size: 11pt;\"><span style=\"line-height: 15.6933px;\"><span style=\"font-family: Calibri, sans-serif;\"> Select appropriate camera and steer to coordinate location<br> Select appropriate camera and steer using presets<br> Select appropriate camera and switch to pre-defined zone<\/span><\/span><\/span><\/p><p style=\"margin-bottom: 11px; line-height: 19.6px; letter-spacing: 0.5px; color: rgb(51, 51, 51); font-family: Helvetica; font-size: 14px;\"><img height=\"336\" src=\"https:\/\/ascentae.magentrixcloud.com\/sys\/staticasset\/read\/file-i667a6f5bbd13e1b0.png\" width=\"450\" style=\"border-style: none; border-color: initial; border-image: initial;\"><\/p><p style=\"margin-bottom: 11px; line-height: 19.6px; letter-spacing: 0.5px; color: rgb(51, 51, 51); font-family: Helvetica; font-size: 14px;\"><span style=\"font-size: 11pt;\"><span style=\"line-height: 15.6933px;\"><span style=\"font-family: Calibri, sans-serif;\">Note: Not all camera controllers support all these modes. Refer the camera vendor documentation for details.<\/span><\/span><\/span><\/p><p style=\"margin-bottom: 11px; line-height: 19.6px; letter-spacing: 0.5px; color: rgb(51, 51, 51); font-family: Helvetica; font-size: 14px;\"><span style=\"font-size: 11pt;\"><span style=\"line-height: 15.6933px;\"><span style=\"font-family: Calibri, sans-serif;\">Camera zoning is covered in detail in a separate knowledge base article.<\/span><\/span><\/span><\/p><h2 style=\"font-family: Helvetica; line-height: 1.1; color: rgb(51, 51, 51); margin-top: 3px; margin-bottom: 10px; font-size: 24px;\"><span style=\"font-size: 13pt;\"><span style=\"line-height: 18.5467px;\"><span style=\"font-family: "Calibri Light", sans-serif;\"><span style=\"color: rgb(47, 84, 150);\"><b>Choosing the correct camera<\/b><\/span><\/span><\/span><\/span><\/h2><p style=\"margin-bottom: 11px; line-height: 19.6px; letter-spacing: 0.5px; color: rgb(51, 51, 51); font-family: Helvetica; font-size: 14px;\"><span style=\"font-size: 11pt;\"><span style=\"line-height: 15.6933px;\"><span style=\"font-family: Calibri, sans-serif;\">Nureva have created a suite of API calls which different camera providers have utilized to integrate with the Nureva devices. Currently these are Aver and Lumens, plus drivers and sound tracking modules by Crestron and Extron.<\/span><\/span><\/span><\/p><p style=\"margin-bottom: 11px; line-height: 19.6px; letter-spacing: 0.5px; color: rgb(51, 51, 51); font-family: Helvetica; font-size: 14px;\"><span style=\"font-size: 11pt;\"><span style=\"line-height: 15.6933px;\"><span style=\"font-family: Calibri, sans-serif;\">Typically, each camera vendor has created a software camera controller (in some instances it may be a hardware device). Nureva confirm compatibility with the camera controller. However, not all cameras from a specific vendor will be supported on the controller software. It is the responsibility of the integrator to confirm compatibility of cameras and camera control solution.<\/span><\/span><\/span><\/p><p style=\"margin-bottom: 11px; line-height: 19.6px; letter-spacing: 0.5px; color: rgb(51, 51, 51); font-family: Helvetica; font-size: 14px;\"><span style=\"font-size: 11pt;\"><span style=\"line-height: 15.6933px;\"><span style=\"font-family: Calibri, sans-serif;\">Make sure you check the focus length \/ zoom capabilities of the proposed camera. If you are installing in a large room, the camera should be able to zoom and focus clearly on the furthest participant.<\/span><\/span><\/span><\/p><p style=\"margin-bottom: 11px; line-height: 19.6px; letter-spacing: 0.5px; color: rgb(51, 51, 51); font-family: Helvetica; font-size: 14px;\"><span style=\"font-size: 11pt;\"><span style=\"line-height: 15.6933px;\"><span style=\"font-family: Calibri, sans-serif;\">Currently supported camera drivers are as follows.<\/span><\/span><\/span><\/p><p style=\"margin-bottom: 11px; line-height: 19.6px; letter-spacing: 0.5px; color: rgb(51, 51, 51); font-family: Helvetica; font-size: 14px;\"><img height=\"230\" src=\"https:\/\/ascentae.magentrixcloud.com\/sys\/staticasset\/read\/file-i604cdf5537f7dcee.png\" width=\"945\" style=\"border-style: none; border-color: initial; border-image: initial; width: 697px; height: 170px;\"><\/p><p style=\"margin-bottom: 11px; line-height: 19.6px; letter-spacing: 0.5px; color: rgb(51, 51, 51); font-family: Helvetica; font-size: 14px;\"><span style=\"font-size: 11pt;\"><span style=\"line-height: 15.6933px;\"><span style=\"font-family: Calibri, sans-serif;\">Note that camera switching is not supported by PTZApp 2 (single camera only)<\/span><\/span><\/span><\/p><p style=\"margin-bottom: 11px; line-height: 19.6px; letter-spacing: 0.5px; color: rgb(51, 51, 51); font-family: Helvetica; font-size: 14px;\"><img height=\"223\" src=\"https:\/\/ascentae.magentrixcloud.com\/sys\/staticasset\/read\/file-ib83d4bb2852d89f3.png\" width=\"866\" style=\"border-style: none; border-color: initial; border-image: initial; width: 687px; height: 177px;\"><\/p><p style=\"margin-bottom: 11px; line-height: 19.6px; letter-spacing: 0.5px; color: rgb(51, 51, 51); font-family: Helvetica; font-size: 14px;\"><span style=\"font-size: 11pt;\"><span style=\"line-height: 15.6933px;\"><span style=\"font-family: Calibri, sans-serif;\">Note that camera switching is not supported by CamConnect Lite (single camera only)<\/span><\/span><\/span><\/p><p style=\"margin-bottom: 11px; line-height: 19.6px; letter-spacing: 0.5px; color: rgb(51, 51, 51); font-family: Helvetica; font-size: 14px;\"><img height=\"225\" src=\"https:\/\/ascentae.magentrixcloud.com\/sys\/staticasset\/read\/file-iac4be6e04bba1f7.png\" width=\"949\" style=\"border-style: none; border-color: initial; border-image: initial; width: 678px; height: 165px;\"><\/p><p style=\"margin-bottom: 11px; line-height: 19.6px; letter-spacing: 0.5px; color: rgb(51, 51, 51); font-family: Helvetica; font-size: 14px;\"><span style=\"font-size: 11pt;\"><span style=\"line-height: 15.6933px;\"><span style=\"font-family: Calibri, sans-serif;\">Cameras that support preset recall and have a Crestron module can support sound location data.<\/span><\/span><\/span><\/p><p style=\"margin-bottom: 11px; line-height: 19.6px; letter-spacing: 0.5px; color: rgb(51, 51, 51); font-family: Helvetica; font-size: 14px;\"><img height=\"221\" src=\"https:\/\/ascentae.magentrixcloud.com\/sys\/staticasset\/read\/file-i50251029477a91c1.png\" width=\"945\" style=\"border-style: none; border-color: initial; border-image: initial; width: 678px; height: 165px;\"><\/p><p style=\"margin-bottom: 11px; line-height: 19.6px; letter-spacing: 0.5px; color: rgb(51, 51, 51); font-family: Helvetica; font-size: 14px;\"><span style=\"font-size: 11pt;\"><span style=\"line-height: 15.6933px;\"><span style=\"font-family: Calibri, sans-serif;\">Cameras that support preset recall and have an Extron driver can support sound location data.<\/span><\/span><\/span><\/p><h2 style=\"font-family: Helvetica; line-height: 1.1; color: rgb(51, 51, 51); margin-top: 3px; margin-bottom: 10px; font-size: 24px;\"><span style=\"font-size: 13pt;\"><span style=\"line-height: 18.5467px;\"><span style=\"font-family: "Calibri Light", sans-serif;\"><span style=\"color: rgb(47, 84, 150);\"><b>Positioning of the Nureva Sound Bars<\/b><\/span><\/span><\/span><\/span><\/h2><p style=\"margin-bottom: 11px; line-height: 19.6px; letter-spacing: 0.5px; color: rgb(51, 51, 51); font-family: Helvetica; font-size: 14px;\"><span style=\"font-size: 11pt;\"><span style=\"line-height: 15.6933px;\"><span style=\"font-family: Calibri, sans-serif;\">For the HL300 \/ HDL310 remember that the camera reference point is the centre of the sound bar.<\/span><\/span><\/span><\/p><p style=\"margin-bottom: 11px; line-height: 19.6px; letter-spacing: 0.5px; color: rgb(51, 51, 51); font-family: Helvetica; font-size: 14px;\"><span style=\"font-size: 11pt;\"><span style=\"line-height: 15.6933px;\"><span style=\"font-family: Calibri, sans-serif;\">The ideal position for the sound bar is above the screen \u2013 allowing sufficient clearance for the audio to be reflected off the wall into the microphones.<\/span><\/span><\/span><\/p><p style=\"margin-bottom: 11px; line-height: 19.6px; letter-spacing: 0.5px; color: rgb(51, 51, 51); font-family: Helvetica; font-size: 14px;\"><span style=\"font-size: 11pt;\"><span style=\"line-height: 15.6933px;\"><span style=\"font-family: Calibri, sans-serif;\">It is important that there is no obstruction underneath the sound bar as this will degrade audio quality and cause inaccurate sound location data.<\/span><\/span><\/span><\/p><p style=\"margin-bottom: 11px; line-height: 19.6px; letter-spacing: 0.5px; color: rgb(51, 51, 51); font-family: Helvetica; font-size: 14px;\"><span style=\"font-size: 11pt;\"><span style=\"line-height: 15.6933px;\"><span style=\"font-family: Calibri, sans-serif;\">To ensure best audio performance, measure how far your screen sits from the wall, and mount the sound bar so the bottom is 1.5 x this distance.<\/span><\/span><\/span><\/p><p style=\"margin-bottom: 11px; line-height: 19.6px; letter-spacing: 0.5px; color: rgb(51, 51, 51); font-family: Helvetica; font-size: 14px;\"><span style=\"font-size: 11pt;\"><span style=\"line-height: 15.6933px;\"><span style=\"font-family: Calibri, sans-serif;\">E.g. if you screen sits 10cm proud of the wall, the bottom of the sound bar should be 15cm from the top of the screen.<\/span><\/span><\/span><\/p><p style=\"margin-bottom: 11px; line-height: 19.6px; letter-spacing: 0.5px; color: rgb(51, 51, 51); font-family: Helvetica; font-size: 14px;\"><span style=\"font-size: 11pt;\"><span style=\"line-height: 15.6933px;\"><span style=\"font-family: Calibri, sans-serif;\">Refer to the Microphone clearance requirements guide for more details<br><a href=\"https:\/\/support.nureva.com\/docs\/installation-hdl300-microphone-clearance-requirements-and-recommendations-2\" style=\"color: rgb(5, 99, 193); text-decoration: underline;\">https:\/\/support.nureva.com\/docs\/installation-hdl300-microphone-clearance-requirements-and-recommendations-2<\/a><\/span><\/span><\/span><\/p><p style=\"margin-bottom: 11px; line-height: 19.6px; letter-spacing: 0.5px; color: rgb(51, 51, 51); font-family: Helvetica; font-size: 14px;\"><span style=\"font-size: 11pt;\"><span style=\"line-height: 15.6933px;\"><span style=\"font-family: Calibri, sans-serif;\">We recommend that cameras are mounted underneath the screen where possible, but if underneath HDL sound bar, allow at least 6\u201d (15cm) clearance from the top of the camera to the bottom of the sound bar.<\/span><\/span><\/span><\/p><p style=\"margin-bottom: 11px; line-height: 19.6px; letter-spacing: 0.5px; color: rgb(51, 51, 51); font-family: Helvetica; font-size: 14px;\"><span style=\"color: rgb(47, 84, 150); font-family: "Calibri Light", sans-serif; font-size: 13pt;\"><b>Available Resources<\/b><\/span><\/p><p style=\"margin-bottom: 11px; line-height: 19.6px; letter-spacing: 0.5px; color: rgb(51, 51, 51); font-family: Helvetica; font-size: 14px;\"><span style=\"font-size: 11pt;\"><span style=\"line-height: 15.6933px;\"><span style=\"font-family: Calibri, sans-serif;\">Supported camera solution - <a href=\"https:\/\/support.nureva.com\/docs\/supported-integrations-for-camera-switching-and-tracking-1\" style=\"color: rgb(5, 99, 193); text-decoration: underline;\">https:\/\/support.nureva.com\/docs\/supported-integrations-for-camera-switching-and-tracking-1<\/a><\/span><\/span><\/span><\/p><p style=\"margin-bottom: 11px; line-height: 19.6px; letter-spacing: 0.5px; color: rgb(51, 51, 51); font-family: Helvetica; font-size: 14px;\"><span style=\"font-size: 11pt;\"><span style=\"line-height: 15.6933px;\"><span style=\"font-family: Calibri, sans-serif;\">Aver Integration Instructions - <a href=\"https:\/\/support.nureva.com\/docs\/integrate-aver-cameras-with-camera-tracking\" style=\"color: rgb(5, 99, 193); text-decoration: underline;\">https:\/\/support.nureva.com\/docs\/integrate-aver-cameras-with-camera-tracking<\/a><\/span><\/span><\/span><\/p><p style=\"margin-bottom: 11px; line-height: 19.6px; letter-spacing: 0.5px; color: rgb(51, 51, 51); font-family: Helvetica; font-size: 14px;\"><span style=\"font-size: 11pt;\"><span style=\"line-height: 15.6933px;\"><span style=\"font-family: Calibri, sans-serif;\">Lumens Integration Instructions - <a href=\"https:\/\/support.nureva.com\/docs\/how-to-integrate-with-lumens-ptz-cameras\" style=\"color: rgb(5, 99, 193); text-decoration: underline;\">https:\/\/support.nureva.com\/docs\/how-to-integrate-with-lumens-ptz-cameras<\/a><\/span><\/span><\/span><\/p><p style=\"margin-bottom: 11px; line-height: 19.6px; letter-spacing: 0.5px; color: rgb(51, 51, 51); font-family: Helvetica; font-size: 14px;\"><span style=\"font-size: 11pt;\"><span style=\"line-height: 15.6933px;\"><span style=\"font-family: Calibri, sans-serif;\">Crestron Module Instructions - <a href=\"https:\/\/support.nureva.com\/docs\/use-crestron-sound-tracking-module\" style=\"color: rgb(5, 99, 193); text-decoration: underline;\">https:\/\/support.nureva.com\/docs\/use-crestron-sound-tracking-module<\/a><\/span><\/span><\/span><\/p><p style=\"margin-bottom: 11px; line-height: 19.6px; letter-spacing: 0.5px; color: rgb(51, 51, 51); font-family: Helvetica; font-size: 14px;\"><span style=\"font-size: 11pt;\"><span style=\"line-height: 15.6933px;\"><span style=\"font-family: Calibri, sans-serif;\">Extron Driver Instructions - <a href=\"https:\/\/support.nureva.com\/docs\/using-extron-sound-tracking-driver\" style=\"color: rgb(5, 99, 193); text-decoration: underline;\">https:\/\/support.nureva.com\/docs\/using-extron-sound-tracking-driver<\/a><\/span><\/span><\/span><\/p><p style=\"margin-bottom: 11px; line-height: 19.6px; letter-spacing: 0.5px; color: rgb(51, 51, 51); font-family: Helvetica; font-size: 14px;\"><span style=\"font-size: 13pt;\"><span style=\"line-height: 18.5467px;\"><span style=\"font-family: "Calibri Light", sans-serif;\"><span style=\"color: rgb(47, 84, 150);\"><b>Watch out for reflections<\/b><\/span><\/span><\/span><\/span><\/p><p style=\"margin-bottom: 11px; line-height: 19.6px; letter-spacing: 0.5px; color: rgb(51, 51, 51); font-family: Helvetica; font-size: 14px;\"><span style=\"font-size: 11pt;\"><span style=\"line-height: 15.6933px;\"><span style=\"font-family: Calibri, sans-serif;\">Cameras are dumb and can easily be confused by reflections in windows.<\/span><\/span><\/span><\/p><p style=\"margin-bottom: 11px; line-height: 19.6px; letter-spacing: 0.5px; color: rgb(51, 51, 51); font-family: Helvetica; font-size: 14px;\"><span style=\"font-size: 11pt;\"><span style=\"line-height: 15.6933px;\"><span style=\"font-family: Calibri, sans-serif;\">Be mindful of setting presets that can catch reflected images, or setting the camera to track in areas where windows will reflect if it\u2019s dark outside.<\/span><\/span><\/span><\/p><p style=\"margin-bottom: 11px; line-height: 19.6px; letter-spacing: 0.5px; color: rgb(51, 51, 51); font-family: Helvetica; font-size: 14px;\"><span style=\"font-size: 11pt;\"><span style=\"line-height: 15.6933px;\"><span style=\"font-family: Calibri, sans-serif;\">Ideally, curtains or blinds will not only avoid this issue, but have the additional benefit of reducing echo and reverberation in the room and so improve performance of the HDL device.<\/span><\/span><\/span><\/p><h2 style=\"font-family: Helvetica; line-height: 1.1; color: rgb(51, 51, 51); margin-top: 3px; margin-bottom: 10px; font-size: 24px;\"><span style=\"font-size: 13pt;\"><span style=\"line-height: 18.5467px;\"><span style=\"font-family: "Calibri Light", sans-serif;\"><span style=\"color: rgb(47, 84, 150);\"><b>If in doubt, ask Ascentae<\/b><\/span><\/span><\/span><\/span><\/h2><p style=\"margin-bottom: 11px; line-height: 19.6px; letter-spacing: 0.5px; color: rgb(51, 51, 51); font-family: Helvetica; font-size: 14px;\"><span style=\"font-size: 11pt;\"><span style=\"line-height: 15.6933px;\"><span style=\"font-family: Calibri, sans-serif;\">We are here to help. Please ask if you need any guidance, or would like to engage us to do a consultation on HDL and camera integration.<\/span><\/span><\/span><\/p>","author_id":5,"category_id":3,"status":"published","created_at":"2026-02-08 20:19:16","updated_at":"2026-02-08 20:19:16","username":"nick","first_name":"Nick","last_name":"Palmer","profile_photo":"assets\/user\/profile\/1788702782_nick (1).png","cat_name":"Installation","search_score":46},{"id":29,"title":"Nureva Audio - Camera Zoning Guide","content":"<div style=\"color: rgb(51, 51, 51); font-family: Helvetica; font-size: 14px; border-bottom-width: 1pt; border-bottom-color: rgb(68, 114, 196); border-top-width: 1pt; border-top-color: rgb(68, 114, 196); border-left: none; border-right: none; padding: 10pt 0cm; margin-left: 58px; margin-right: 58px;\"><p class=\"MsoIntenseQuote\" style=\"margin-top: 24px; margin-bottom: 24px; line-height: 19.6px; letter-spacing: 0.5px; border: none; text-align: center; padding: 0cm;\"><span style=\"font-size: 11pt;\"><span style=\"line-height: 15.6933px;\"><span style=\"font-family: Calibri, sans-serif;\"><span style=\"color: rgb(68, 114, 196);\"><span style=\"font-style: italic;\"><span style=\"font-size: 14pt;\"><span style=\"line-height: 19.9733px;\"><span style=\"font-style: normal;\"><b>Nureva HDL410<br>Best Practice for Camera Zoning<\/b><\/span><\/span><\/span><\/span><\/span><\/span><\/span><\/span><\/p><\/div><p style=\"margin-bottom: 11px; line-height: 19.6px; letter-spacing: 0.5px; color: rgb(51, 51, 51); font-family: Helvetica; font-size: 14px;\"> <\/p><p style=\"margin-bottom: 11px; line-height: 19.6px; letter-spacing: 0.5px; color: rgb(51, 51, 51); font-family: Helvetica; font-size: 14px;\"><span style=\"font-size: 12pt;\"><span style=\"font-family: "Times New Roman", serif;\"><span style=\"font-size: 11pt;\"><span style=\"font-family: Calibri, sans-serif;\">Before installing a camera zoning solution to integrate with your Nureva audio solution, we recommend you refer to the below information and important links.<\/span><\/span><\/span><\/span><\/p><div style=\"color: rgb(51, 51, 51); font-family: Helvetica; font-size: 14px; border-bottom-width: 1pt; border-bottom-color: windowtext; padding: 0cm 0cm 1pt;\"><p style=\"margin-bottom: 11px; line-height: 19.6px; letter-spacing: 0.5px; border: none; padding: 0cm;\"><span style=\"font-size: 11pt;\"><span style=\"line-height: 15.6933px;\"><span style=\"font-family: Calibri, sans-serif;\">You can find comprehensive instructions on installing and configuring a Nureva \/ camera solution on the Nureva Support site.<\/span><\/span><\/span><\/p><p style=\"margin-bottom: 11px; line-height: 19.6px; letter-spacing: 0.5px; border: none; padding: 0cm;\"><span style=\"font-size: 11pt;\"><span style=\"line-height: 15.6933px;\"><span style=\"font-family: Calibri, sans-serif;\">This article gives guidance you may not find online, plus some Top Tips that we have picked up.<\/span><\/span><\/span><\/p><p style=\"margin-bottom: 11px; line-height: 19.6px; letter-spacing: 0.5px; border: none; padding: 0cm;\"> <\/p><\/div><h2 style=\"font-family: Helvetica; font-weight: 500; line-height: 1.1; color: rgb(51, 51, 51); margin-top: 3px; margin-bottom: 10px; font-size: 24px;\"><span style=\"font-size: 13pt;\"><span style=\"line-height: 18.5467px;\"><span style=\"font-family: "Calibri Light", sans-serif;\"><span style=\"color: rgb(47, 84, 150);\">Understand the customer requirements<\/span><\/span><\/span><\/span><\/h2><p style=\"margin-bottom: 11px; line-height: 19.6px; letter-spacing: 0.5px; color: rgb(51, 51, 51); font-family: Helvetica; font-size: 14px;\"><img height=\"499\" src=\"https:\/\/ascentae.magentrixcloud.com\/sys\/staticasset\/read\/file-i6dab0759bd8b2e72.png\" width=\"814\" style=\"border-style: none; border-color: initial; border-image: initial; width: 589px; height: 361px;\"><\/p><p style=\"margin-bottom: 11px; line-height: 19.6px; letter-spacing: 0.5px; color: rgb(51, 51, 51); font-family: Helvetica; font-size: 14px;\"><span style=\"font-size: 11pt;\"><span style=\"line-height: 15.6933px;\"><span style=\"font-family: Calibri, sans-serif;\">When integrating the HDL410 for camera zoning, you can install up to 3 cameras covering different areas of the space.<\/span><\/span><\/span><\/p><p style=\"margin-bottom: 11px; line-height: 19.6px; letter-spacing: 0.5px; color: rgb(51, 51, 51); font-family: Helvetica; font-size: 14px;\"><span style=\"font-size: 11pt;\"><span style=\"line-height: 15.6933px;\"><span style=\"font-family: Calibri, sans-serif;\">A typical use case may be a presenter \/ audience configuration, with a camera facing the front of the room for presentations and another 1 or 2 covering the audience.<\/span><\/span><\/span><\/p><p style=\"margin-bottom: 11px; line-height: 19.6px; letter-spacing: 0.5px; color: rgb(51, 51, 51); font-family: Helvetica; font-size: 14px;\"><span style=\"font-size: 11pt;\"><span style=\"line-height: 15.6933px;\"><span style=\"font-family: Calibri, sans-serif;\">We also see this in use in larger meeting rooms where a single camera struggles to cover the entire room.<\/span><\/span><\/span><\/p><p style=\"margin-bottom: 11px; line-height: 19.6px; letter-spacing: 0.5px; color: rgb(51, 51, 51); font-family: Helvetica; font-size: 14px;\"><span style=\"font-size: 11pt;\"><span style=\"line-height: 15.6933px;\"><span style=\"font-family: Calibri, sans-serif;\">If you have any queries about this, please contact Ascentae for advice. We can even offer a full pre-installation consultancy service to help with this.<\/span><\/span><\/span><\/p><p style=\"margin-bottom: 11px; line-height: 19.6px; letter-spacing: 0.5px; color: rgb(51, 51, 51); font-family: Helvetica; font-size: 14px;\"> <\/p><h2 style=\"font-family: Helvetica; font-weight: 500; line-height: 1.1; color: rgb(51, 51, 51); margin-top: 3px; margin-bottom: 10px; font-size: 24px;\"><img class=\"img-responsive\" height=\"336\" src=\"https:\/\/ascentae.magentrixcloud.com\/sys\/staticasset\/read\/file-i8379070651679242.png\" width=\"450\" style=\"border-style: none; border-color: initial; border-image: initial;\"><\/h2><h2 style=\"font-family: Helvetica; font-weight: 500; line-height: 1.1; color: rgb(51, 51, 51); margin-top: 3px; margin-bottom: 10px; font-size: 24px;\"><span style=\"font-size: 13pt;\"><span style=\"line-height: 18.5467px;\"><span style=\"font-family: "Calibri Light", sans-serif;\"><span style=\"color: rgb(47, 84, 150);\">Understand the limitations of the technology<\/span><\/span><\/span><\/span><\/h2><p style=\"margin-bottom: 11px; line-height: 19.6px; letter-spacing: 0.5px; color: rgb(51, 51, 51); font-family: Helvetica; font-size: 14px;\"><span style=\"font-size: 11pt;\"><span style=\"line-height: 15.6933px;\"><span style=\"font-family: Calibri, sans-serif;\">The HDL410 will deliver X,Y co-ordinates to an Inogeni Cam230 camera switcher, enabling it to switch to a camera relating to a specific zone in the room.<\/span><\/span><\/span><\/p><p style=\"margin-bottom: 11px; line-height: 19.6px; letter-spacing: 0.5px; color: rgb(51, 51, 51); font-family: Helvetica; font-size: 14px;\"><span style=\"font-size: 11pt;\"><span style=\"line-height: 15.6933px;\"><span style=\"font-family: Calibri, sans-serif;\">It is then a function of the camera to Pan, Tilt and Zoom within that zone. Additional camera software may be required to enable this.<\/span><\/span><\/span><\/p><p style=\"margin-bottom: 11px; line-height: 19.6px; letter-spacing: 0.5px; color: rgb(51, 51, 51); font-family: Helvetica; font-size: 14px;\"><span style=\"font-size: 11pt;\"><span style=\"line-height: 15.6933px;\"><span style=\"font-family: Calibri, sans-serif;\">Zones cannot overlap \u2013 or be too close together \u2013 as this could result in the cameras switching incorrectly.<\/span><\/span><\/span><\/p><p style=\"margin-bottom: 11px; line-height: 19.6px; letter-spacing: 0.5px; color: rgb(51, 51, 51); font-family: Helvetica; font-size: 14px;\"><span style=\"font-size: 11pt;\"><span style=\"line-height: 15.6933px;\"><span style=\"font-family: Calibri, sans-serif;\">Both the HDL410 and Inogeni CAM230 MUST be connected to a network and the HDL410 MUST have internet access and be enrolled in Console Cloud.<\/span><\/span><\/span><\/p><p style=\"margin-bottom: 11px; line-height: 19.6px; letter-spacing: 0.5px; color: rgb(51, 51, 51); font-family: Helvetica; font-size: 14px;\"><span style=\"font-size: 13pt;\"><span style=\"line-height: 18.5467px;\"><span style=\"font-family: "Calibri Light", sans-serif;\"><span style=\"color: rgb(47, 84, 150);\">Choosing the correct camera<\/span><\/span><\/span><\/span><\/p><p style=\"margin-bottom: 11px; line-height: 19.6px; letter-spacing: 0.5px; color: rgb(51, 51, 51); font-family: Helvetica; font-size: 14px;\"><span style=\"font-size: 11pt;\"><span style=\"line-height: 15.6933px;\"><span style=\"font-family: Calibri, sans-serif;\">The Inogeni CAM230 allows up to 3 cameras to be integrated \u2013 2 USB and 1 HDMI. Alternatively, a 3<span style=\"font-size: 11px; line-height: 0; position: relative; vertical-align: baseline; top: -0.5em;\">rd<\/span> USB camera can be supported using the Inogeni U-CAM convertor.<\/span><\/span><\/span><\/p><p style=\"margin-bottom: 11px; line-height: 19.6px; letter-spacing: 0.5px; color: rgb(51, 51, 51); font-family: Helvetica; font-size: 14px;\"><span style=\"font-size: 11pt;\"><span style=\"line-height: 15.6933px;\"><span style=\"font-family: Calibri, sans-serif;\">This gives great flexibility and allows different types of camera to be used depending on the application.<\/span><\/span><\/span><\/p><p style=\"margin-bottom: 11px; line-height: 19.6px; letter-spacing: 0.5px; color: rgb(51, 51, 51); font-family: Helvetica; font-size: 14px;\"><span style=\"font-size: 11pt;\"><span style=\"line-height: 15.6933px;\"><span style=\"font-family: Calibri, sans-serif;\">For example, a framing camera (such as Huddly L1) could be used to accurately frame a presenter as they move around the front of the room and a PTZ camera could be used for the audience. A 3<span style=\"font-size: 11px; line-height: 0; position: relative; vertical-align: baseline; top: -0.5em;\">rd<\/span>, static camera could be trained on a whiteboard to capture the content when someone is writing on the board.<\/span><\/span><\/span><\/p><h2 style=\"font-family: Helvetica; font-weight: 500; line-height: 1.1; color: rgb(51, 51, 51); margin-top: 3px; margin-bottom: 10px; font-size: 24px;\"><span style=\"font-size: 13pt;\"><span style=\"line-height: 18.5467px;\"><span style=\"font-family: "Calibri Light", sans-serif;\"><span style=\"color: rgb(47, 84, 150);\">Positioning of the Nureva Sound Bars<\/span><\/span><\/span><\/span><\/h2><p style=\"margin-bottom: 11px; line-height: 19.6px; letter-spacing: 0.5px; color: rgb(51, 51, 51); font-family: Helvetica; font-size: 14px;\"><span style=\"font-size: 11pt;\"><span style=\"line-height: 15.6933px;\"><span style=\"font-family: Calibri, sans-serif;\">It is strongly recommended that the 2 sound bars are mounted on opposite or adjacent walls to provide the most accurate sound location data. <\/span><\/span><\/span><img height=\"294\" src=\"https:\/\/ascentae.magentrixcloud.com\/sys\/staticasset\/read\/file-ibf81404f951e1a0a.png\" width=\"951\" style=\"border-style: none; border-color: initial; border-image: initial; width: 602px; height: 186px;\"><\/p><p style=\"margin-bottom: 11px; line-height: 19.6px; letter-spacing: 0.5px; color: rgb(51, 51, 51); font-family: Helvetica; font-size: 14px;\"><span style=\"font-size: 11pt;\"><span style=\"line-height: 15.6933px;\"><span style=\"font-family: Calibri, sans-serif;\">As with all installations of Nureva sound bars, ensure the sound bars are not mounted directly above a screen or other obstruction.<\/span><\/span><\/span><\/p><p style=\"margin-bottom: 11px; line-height: 19.6px; letter-spacing: 0.5px; color: rgb(51, 51, 51); font-family: Helvetica; font-size: 14px;\"><span style=\"font-size: 11pt;\"><span style=\"line-height: 15.6933px;\"><span style=\"font-family: Calibri, sans-serif;\">We have found that any obstructions underneath the sound bar can cause problems with accurate sound location data, so ideally they should be mounted with nothing underneath them. However, if this is not possible, refer to the Microphone clearance requirements guide for details on how to install.<\/span><\/span><\/span><\/p><p style=\"margin-bottom: 11px; line-height: 19.6px; letter-spacing: 0.5px; color: rgb(51, 51, 51); font-family: Helvetica; font-size: 14px;\"><span style=\"font-size: 11pt;\"><span style=\"line-height: 15.6933px;\"><span style=\"font-family: Calibri, sans-serif;\"><a href=\"https:\/\/support.nureva.com\/docs\/installation-hdl300-microphone-clearance-requirements-and-recommendations-2\" style=\"color: rgb(5, 99, 193); text-decoration: underline;\">https:\/\/support.nureva.com\/docs\/installation-hdl300-microphone-clearance-requirements-and-recommendations-2<\/a><\/span><\/span><\/span><br> <\/p><div style=\"color: rgb(51, 51, 51); font-family: Helvetica; font-size: 14px; break-after: page;\"><\/div><p style=\"margin-bottom: 11px; line-height: 19.6px; letter-spacing: 0.5px; color: rgb(51, 51, 51); font-family: Helvetica; font-size: 14px;\"> <\/p><p style=\"margin-bottom: 11px; line-height: 19.6px; letter-spacing: 0.5px; color: rgb(51, 51, 51); font-family: Helvetica; font-size: 14px;\"> <\/p><h2 style=\"font-family: Helvetica; font-weight: 500; line-height: 1.1; color: rgb(51, 51, 51); margin-top: 3px; margin-bottom: 10px; font-size: 24px;\"><img height=\"504\" src=\"https:\/\/ascentae.magentrixcloud.com\/sys\/staticasset\/read\/file-idfa4301145f140c6.png\" width=\"271\" style=\"border-style: none; border-color: initial; border-image: initial;\"><\/h2><h2 style=\"font-family: Helvetica; font-weight: 500; line-height: 1.1; color: rgb(51, 51, 51); margin-top: 3px; margin-bottom: 10px; font-size: 24px;\"><span style=\"font-size: 13pt;\"><span style=\"line-height: 18.5467px;\"><span style=\"font-family: "Calibri Light", sans-serif;\"><span style=\"color: rgb(47, 84, 150);\">Creating camera zones<\/span><\/span><\/span><\/span><\/h2><p style=\"margin-bottom: 11px; line-height: 19.6px; letter-spacing: 0.5px; color: rgb(51, 51, 51); font-family: Helvetica; font-size: 14px;\"><span style=\"font-size: 11pt;\"><span style=\"line-height: 15.6933px;\"><span style=\"font-family: Calibri, sans-serif;\">Be aware that unless your room is acoustically perfect, X, Y coordinates will always have a margin for error.<\/span><\/span><\/span><\/p><p style=\"margin-bottom: 11px; line-height: 19.6px; letter-spacing: 0.5px; color: rgb(51, 51, 51); font-family: Helvetica; font-size: 14px;\"><span style=\"font-size: 11pt;\"><span style=\"line-height: 15.6933px;\"><span style=\"font-family: Calibri, sans-serif;\">Ideally, make your zones generous and leave at least 50cm gap between them. If zones are too small, or too close together, in room echo can cause inaccuracies and cause the camera to switch unnecessarily.<\/span><\/span><\/span><\/p><p style=\"margin-bottom: 11px; line-height: 19.6px; letter-spacing: 0.5px; color: rgb(51, 51, 51); font-family: Helvetica; font-size: 14px;\"><span style=\"font-size: 11pt;\"><span style=\"line-height: 15.6933px;\"><span style=\"font-family: Calibri, sans-serif;\">It is generally better to have the system revert to the default camera than to focus on the wrong person or continually switch cameras if someone is sat on the edge of 2 zones which are too close together.<\/span><\/span><\/span><\/p><h2 style=\"font-family: Helvetica; font-weight: 500; line-height: 1.1; color: rgb(51, 51, 51); margin-top: 3px; margin-bottom: 10px; font-size: 24px;\"><span style=\"font-size: 13pt;\"><span style=\"line-height: 18.5467px;\"><span style=\"font-family: "Calibri Light", sans-serif;\"><span style=\"color: rgb(47, 84, 150);\">Watch out for reflections<\/span><\/span><\/span><\/span><\/h2><p style=\"margin-bottom: 11px; line-height: 19.6px; letter-spacing: 0.5px; color: rgb(51, 51, 51); font-family: Helvetica; font-size: 14px;\"><span style=\"font-size: 11pt;\"><span style=\"line-height: 15.6933px;\"><span style=\"font-family: Calibri, sans-serif;\">Cameras are dumb and can easily be confused by reflections in windows.<\/span><\/span><\/span><\/p><p style=\"margin-bottom: 11px; line-height: 19.6px; letter-spacing: 0.5px; color: rgb(51, 51, 51); font-family: Helvetica; font-size: 14px;\"><span style=\"font-size: 11pt;\"><span style=\"line-height: 15.6933px;\"><span style=\"font-family: Calibri, sans-serif;\">Be mindful of setting presets that can catch reflected images, or setting the camera to track in areas where windows will reflect if it\u2019s dark outside.<\/span><\/span><\/span><\/p><p style=\"margin-bottom: 11px; line-height: 19.6px; letter-spacing: 0.5px; color: rgb(51, 51, 51); font-family: Helvetica; font-size: 14px;\"><span style=\"font-size: 11pt;\"><span style=\"line-height: 15.6933px;\"><span style=\"font-family: Calibri, sans-serif;\">Ideally, curtains or blinds will not only avoid this issue, but have the additional benefit of reducing echo and reverberation in the room and so improve performance of the HDL device.<\/span><\/span><\/span><\/p><p style=\"margin-bottom: 11px; line-height: 19.6px; letter-spacing: 0.5px; color: rgb(51, 51, 51); font-family: Helvetica; font-size: 14px;\"><span style=\"color: rgb(47, 84, 150); font-family: "Calibri Light", sans-serif; font-size: 13pt;\">If in doubt, Ask Ascentae<\/span><\/p><p style=\"margin-bottom: 11px; line-height: 19.6px; letter-spacing: 0.5px; color: rgb(51, 51, 51); font-family: Helvetica; font-size: 14px;\"><span style=\"font-size: 11pt;\"><span style=\"line-height: 15.6933px;\"><span style=\"font-family: Calibri, sans-serif;\">We are here to help. Please ask if you need any guidance, or would like to engage us to do a consultation on HDL and camera integration.<\/span><\/span><\/span><\/p><p style=\"margin-bottom: 11px; line-height: 19.6px; letter-spacing: 0.5px; color: rgb(51, 51, 51); font-family: Helvetica; font-size: 14px;\"><span style=\"color: rgb(47, 84, 150); font-family: "Calibri Light", sans-serif; font-size: 13pt;\">Available Resources<\/span><\/p><p style=\"margin-bottom: 11px; line-height: 19.6px; letter-spacing: 0.5px; color: rgb(51, 51, 51); font-family: Helvetica; font-size: 14px;\"><span style=\"font-size: 11pt;\"><span style=\"line-height: 15.6933px;\"><span style=\"font-family: Calibri, sans-serif;\">Inogeni Integration FAQ\u2019s - <a href=\"https:\/\/support.nureva.com\/docs\/technical-faqs-hdl410-and-inogeni-cam230\" style=\"color: rgb(5, 99, 193); text-decoration: underline;\">https:\/\/support.nureva.com\/docs\/technical-faqs-hdl410-and-inogeni-cam230<\/a><\/span><\/span><\/span><\/p><p style=\"margin-bottom: 11px; line-height: 19.6px; letter-spacing: 0.5px; color: rgb(51, 51, 51); font-family: Helvetica; font-size: 14px;\"><span style=\"font-size: 11pt;\"><span style=\"line-height: 15.6933px;\"><span style=\"font-family: Calibri, sans-serif;\">Inogeni Integration Guide - <a href=\"https:\/\/support.nureva.com\/docs\/integration-guide-hdl410-and-cam230\" style=\"color: rgb(5, 99, 193); text-decoration: underline;\">https:\/\/support.nureva.com\/docs\/integration-guide-hdl410-and-cam230<\/a><\/span><\/span><\/span><\/p>","author_id":5,"category_id":3,"status":"published","created_at":"2026-02-08 20:05:28","updated_at":"2026-02-08 20:05:28","username":"nick","first_name":"Nick","last_name":"Palmer","profile_photo":"assets\/user\/profile\/1788702782_nick (1).png","cat_name":"Installation","search_score":25},{"id":33,"title":"21:9 vs 16:9 aspect ratios - considerations before you buy","content":"<h2>Is History Repeating Itself?<br>\r\nA meditation on 21:9 vs 16:9 Aspect Ratio<\/h2><h2><br><\/h2><p class=\"MsoNormal\"><span style=\"font-size:11.0pt;line-height:115%\"><b>Note: <\/b>This\r\narticle contains cultural references. If\r\nyou were born before 1990, ask your dad.<\/span><\/p><p class=\"MsoNormal\"><br><\/p><hr><p class=\"MsoNormal\"><span style=\"font-size:11.0pt;line-height:115%\"><o:p><br><\/o:p><\/span><\/p><p class=\"MsoNormal\"><span style=\"font-size:11.0pt;line-height:115%\">Commercial\r\ndisplays are going through a bit of a revolution \u2013 at least, that\u2019s what some\r\nmanufacturers would have us believe. \r\nThanks to advances in production technology, we now have access to\r\nultra-wide 21:9 screens that provide a significantly broader canvas<o:p><\/o:p><\/span><\/p><p class=\"MsoNormal\"><span style=\"font-size:11.0pt;line-height:115%\">And yes,\r\nthey look impressive. With around 33%\r\nmore display area than a standard 16:9 screen of equivalent height, they offer\r\nadditional space for digital signage, video meetings and collaborative\r\nworkspaces.<o:p><\/o:p><\/span><\/p><p class=\"MsoNormal\"><span style=\"font-size:11.0pt;line-height:115%\">But let\u2019s\r\nnot get carried away \u2013 bigger isn\u2019t always better. Sometimes, it\u2019s just\u2026wider.<\/span><\/p><p class=\"MsoNormal\"><span style=\"font-size:11.0pt;line-height:115%\"><o:p><br><\/o:p><\/span><\/p><p class=\"MsoNormal\"><span style=\"font-size:11.0pt;line-height:115%\"><o:p><br><\/o:p><\/span><\/p><h3>A brief history of Aspect Ratios<o:p><\/o:p><\/h3><p class=\"MsoNormal\"><span style=\"font-size:11.0pt;line-height:115%\">To\r\nunderstand the pros and cons of 21:9, let\u2019s take a nostalgic trip back to 1998.<o:p><\/o:p><\/span><\/p><p class=\"MsoNormal\"><span style=\"font-size:11.0pt;line-height:115%\">The era of\r\ncrop tops, tiny handbags and boy bands. Robbie\r\nwent solo; 5ive, Aqua & Fat Les stormed the charts. At the cinema we cried at Saving Private\r\nRyan, held our breath in Armageddon and were confused by The Avengers (the one\r\nwith Eddie Izzard and some bees, not the other one). England didn\u2019t win the\r\nWorld Cup. Again.<o:p><\/o:p><\/span><\/p><p class=\"MsoNormal\"><span style=\"font-size:11.0pt;line-height:115%\">It was the\r\nyear of the \u00a32 coin, the Ford Focus, DVD\u2019s and the start of digital\r\ntelevision. An visual revolution was\r\nstarting.<o:p><\/o:p><\/span><\/p><p class=\"MsoNormal\"><span style=\"font-size:11.0pt;line-height:115%\">Back then,\r\nTVs (and commercial screens), were based on CRT technology so were big, bulky\r\nand immovable. They were also 4:3 aspect\r\nratio. Want to know the spec of the\r\nscreen? Check out those horizontal\r\nlines. How about that interlacing?<\/span>\r\n<span style=\"font-size:11.0pt;line-height:115%\"><o:p><\/o:p><\/span><\/p><p class=\"MsoNormal\"><span style=\"font-size:11.0pt;line-height:115%\">TV was\r\nbroadcast in 4:3, and most movies were released on VHS in the same aspect\r\nratio.<o:p><\/o:p><\/span><\/p><p class=\"MsoNormal\"><span style=\"font-size:11.0pt;line-height:115%\">Then came the\r\ngame changer: flat screens. First\r\nplasma, then LCD. These were larger,\r\nslimmer and \u2013 crucially \u2013 widescreen. We\r\nstopped obsessing over lines and instead became familiar with new buzzwords \u2013 720P\r\nHD, 1080i, and Full HD.<o:p><\/o:p><\/span><\/p><p class=\"MsoNormal\"><span style=\"font-size:11.0pt;line-height:115%\">But the\r\ncontent didn\u2019t keep up. That fancy new\r\nwidescreen? It showed black bars on the\r\nsides unless you were watching something special. Even today, catch and old episode of Top Of\r\nThe Pops to relive that nostalgic glory (and terrible haircuts).<o:p><\/o:p><\/span><\/p><p class=\"MsoNormal\"><span style=\"font-size:11.0pt;line-height:115%\">With the\r\nlaunch of digital TV, some content began appearing in widescreen. At last, we could use the missing third of\r\nthe screen. DVDs followed suit, with\r\noptions for aspect ratio settings to match your screen. Now you could stretch your content to fill\r\nthe display, but you would have squashed heads and pixellated everything. Anamorphic fill? No thanks.<o:p><\/o:p><\/span><\/p><p class=\"MsoNormal\"><span style=\"font-size:11.0pt;line-height:115%\">Then came\r\nBlue-ray in 2006. Finally, content\r\nmatched our screens. Native 16:9 was here,\r\nand HD channels began broadcasting in earnest \u2013 only 8 years after flat screens\r\nhad hit the market.<o:p><\/o:p><\/span><\/p><p class=\"MsoNormal\"><span style=\"font-size:11.0pt;line-height:115%\">Why the\r\ndelay? Well, when TV cameras cost\r\n\u00a325,000 apiece \u2013 and up to 20 of them could be used on a single show \u2013\r\nbroadcasters were reluctant to reinvest. \r\nEspecially when no one was sure of HD wasn\u2019t just another fad. Remember 3DTV? No? My\r\npoint exactly.<\/span><\/p><p class=\"MsoNormal\"><span style=\"font-size:11.0pt;line-height:115%\"><o:p><br><\/o:p><\/span><\/p><p class=\"MsoNormal\"><span style=\"font-size:11.0pt;line-height:115%\"><o:p><br><\/o:p><\/span><\/p><h3>Fast forward to Today : Welcome 21:9<o:p><\/o:p><\/h3><p class=\"MsoNormal\" style=\"line-height:normal\"><span style=\"font-size:11.0pt\">Unlike\r\nthe shift from 4:3 to 16:9, which was driven by the consumer market, the\r\ncurrent wave of 21:9 displays is primarily a business-led evolution. These ultra-wide screens are designed to\r\noffer more information on signage and provide richer experiences in meeting.<o:p><\/o:p><\/span><\/p><p class=\"MsoNormal\" style=\"line-height:normal\"><span style=\"font-size:11.0pt\">They\u2019re\r\nespecially good for touch applications. \r\nWider screens mean that more people can interact together \u2013 and\r\ncrucially, no one needs a stepladder to reach the top.<o:p><\/o:p><\/span><\/p><p class=\"MsoNormal\" style=\"line-height:normal\"><span style=\"font-size:11.0pt\">However,\r\nwe nor find ourselves in a familiar place: a transitional period. We\u2019re stuck between current 16:9 HD resolutions\r\nand new 5K resolutions in 21:9 aspect ratio.<o:p><\/o:p><\/span><\/p><p class=\"MsoNormal\" style=\"line-height:normal\"><span style=\"font-size:11.0pt\">As\r\nalways, early adopters face challenges. \r\nThe infrastructure to support native 5K content simply doesn\u2019t exist\r\nyet. It\u2019s Betamax, LaserDisc and HD-DVD\r\nall over again.<o:p><\/o:p><\/span><\/p><p class=\"MsoNormal\" style=\"line-height:normal\"><span style=\"font-size:11.0pt\">If\r\nyour application already supports 5K (or at least a lower resolution 21:9 ratio),\r\nthen great. You\u2019re ahead of the\r\ncurve. But if not, your fancy new\r\ndisplay may be stuck with the same black bars we saw in the early 2000\u2019s, or\r\nyou can use built-in image stretching. \r\nAnd while this tech has come a long way, it still can\u2019t prevent everyone\r\non a Teams call looking like Danny DeVito.<o:p><\/o:p><\/span><\/p><p class=\"MsoNormal\" style=\"line-height:normal\"><span style=\"font-size:11.0pt\">Let\u2019s\r\nbe honest \u2013 no one wants their meeting persona to look like something from a\r\nhall of mirrors. So once again, you\u2019re\r\nleft with a dilemma : underutilise the screen or settle for distorted content.<\/span><\/p><p class=\"MsoNormal\" style=\"line-height:normal\"><span style=\"font-size:11.0pt\"><o:p><br><\/o:p><\/span><\/p><p class=\"MsoNormal\" style=\"line-height:normal\"><span style=\"font-size:11.0pt\"><o:p><br><\/o:p><\/span><\/p><h3>When (and when not) to position 21:9 screens <o:p><\/o:p><\/h3><p class=\"MsoNormal\" style=\"line-height:normal\"><span style=\"font-size:11.0pt\">Here\u2019s\r\nthe deal: if your application can run on a PC where you can force a 21:9\r\nresolution, go for it. Ultra-wide\r\nscreens are fantastic in that case.<o:p><\/o:p><\/span><\/p><p class=\"MsoNormal\" style=\"line-height:normal\"><span style=\"font-size:11.0pt\">If\r\nnot? You may be better served sticking\r\nto 16:9.<o:p><\/o:p><\/span><\/p><p class=\"MsoNormal\" style=\"line-height:normal\"><span style=\"font-size:11.0pt\">For\r\nexample, a Windows based Microsoft Teams Room (MTR system works well with\r\nultra-wide displays. Whilst they may not\r\nsupport full 5K, you choose resolutions like 3440x1440 or 3840x1660 to preserve\r\n21:9 and fill the screen. Plus, you get\r\nthe full benefit of Front Row, which much better use of the available space\r\nthan the default view.<o:p><\/o:p><\/span><\/p><p class=\"MsoNormal\" style=\"line-height:normal\"><span style=\"font-size:11.0pt\">However,\r\nAndroid based MTR\u2019s do you offer that flexibility. Either stick to a 16:9\r\nscreen or proceed with caution.<o:p><\/o:p><\/span><\/p><p class=\"MsoNormal\" style=\"line-height:normal\"><span style=\"font-size:11.0pt\">If\r\nyou\u2019re running an application on an OPS module, that\u2019s fine too \u2013 as long as\r\nyour screen accepts OPS or has the correct module. Always double check compatibility before you\r\nbuy.<o:p><\/o:p><\/span><\/p><p class=\"MsoNormal\" style=\"line-height:normal\"><span style=\"font-size:11.0pt\">Planning\r\na Bring Your Own Meeting (BYOM) setup? \r\nBe wary. Most laptops run 16:9 native\r\nresolutions. If you mirror the display\r\nonto a 21:9 screen, you\u2019ll get black bars. \r\nIf you extend the desktop, some laptops may support 21:9 \u2013 but this\r\ndepends on the machine.<o:p><\/o:p><\/span><\/p><p class=\"MsoNormal\" style=\"line-height:normal\"><span style=\"font-size:11.0pt\">Running\r\nmultiple ultra-wide displays for collaborative work? You\u2019ll need a high-spec PC with dedicated graphics\r\ncard capable of powering multiple 5K screens. \r\nThis is not the time to skimp.<o:p><\/o:p><\/span><\/p><p>\r\n\r\n\r\n\r\n\r\n\r\n\r\n\r\n\r\n\r\n\r\n\r\n\r\n\r\n\r\n\r\n\r\n\r\n\r\n\r\n\r\n\r\n\r\n\r\n\r\n\r\n\r\n\r\n\r\n\r\n\r\n\r\n\r\n\r\n\r\n\r\n\r\n\r\n\r\n\r\n\r\n\r\n\r\n\r\n\r\n\r\n\r\n\r\n\r\n\r\n\r\n\r\n\r\n\r\n\r\n\r\n\r\n\r\n\r\n\r\n\r\n\r\n<span style=\"font-size:11.0pt;line-height:115%;font-family:"Aptos",sans-serif;\r\nmso-ascii-theme-font:minor-latin;mso-fareast-font-family:Aptos;mso-fareast-theme-font:\r\nminor-latin;mso-hansi-theme-font:minor-latin;mso-bidi-font-family:"Times New Roman";\r\nmso-bidi-theme-font:minor-bidi;mso-ansi-language:EN-GB;mso-fareast-language:\r\nEN-US;mso-bidi-language:AR-SA\"><br clear=\"all\" style=\"mso-special-character:line-break;\r\npage-break-before:always\">\r\n<\/span>\r\n\r\n<\/p><p class=\"MsoNormal\"><span style=\"font-size:11.0pt;line-height:115%\"> <\/span><\/p><h3>Cabling & infrastructure: not all cables are created equal<o:p><\/o:p><\/h3><p class=\"MsoNormal\" style=\"line-height:normal\"><span style=\"font-size:11.0pt\">Most\r\nscreens and computers today support HDMI 2.0, but this does not handle 5K\r\nresolution. You can, however, use HDMI\r\nto run 21:9 format at lower resolutions (3440x1440 or 3840x1660), if the\r\ncomputer supports it.<o:p><\/o:p><\/span><\/p><p class=\"MsoNormal\" style=\"line-height:normal\"><span style=\"font-size:11.0pt\">HDMI2.1\r\nand 2.2 are newer and support full 5K resolution, but they are rare in\r\ncommercial screens, computers or AV infrastructure.<o:p><\/o:p><\/span><\/p><p class=\"MsoNormal\" style=\"line-height:normal\"><span style=\"font-size:11.0pt\">DisplayPort\r\nwill support 5K at 21:9 ratio. , but it\u2019s generally found on higher end\r\ndesktops, not laptops \u2013 unless you add an extra graphics card.<o:p><\/o:p><\/span><\/p><p class=\"MsoNormal\" style=\"line-height:normal\"><span style=\"font-size:11.0pt\">USB-C\r\ncan support 5K too, but here\u2019s the catch: USB-C is just the shape of the\r\nport. The cable inside could do anything\r\n\u2013 from charging your phone to transmitting high-speed video and data. A full-featured Thunderbolt cable is what you\r\nneed. And there\u2019s a second issue:\r\npassive Thunderbolt cables max out at 3 meters before the signal degrades. Active cables can run up to 15 meters, but\r\nthey\u2019re expensive. And because they are\r\noptical, they are also fragile.<o:p><\/o:p><\/span><\/p><p class=\"MsoNormal\" style=\"line-height:normal\"><span style=\"font-size:11.0pt\">If\r\nyou\u2019re using switchers or extenders (like ReThink, LightWare, WyreStorm etc),\r\ndon\u2019t expect 5K support just yet. Most\r\nof these max out at 4K, and any higher resolution will be scaled back.<o:p><\/o:p><\/span><\/p><p class=\"MsoNormal\" style=\"line-height:normal\"><span style=\"font-size:11.0pt\">But\r\nthere is good news. Higher spec versions\r\nof these products are on their way. Just\r\nlike the migration from 4:3 to 16:9, there is lag between screen technology and\r\nthe back end infrastructure. Hopefully,\r\nthis time it won\u2019t take 8 years.<o:p><\/o:p><\/span><\/p><h3>In summary - your cut out and keep guide for customers<o:p><\/o:p><\/h3><ul><li style=\"margin-left: 18pt; line-height: normal;\"><span style=\"font-size:11.0pt\">- Advances in screen technology tend to happen before\r\nadvances in content for the screens<o:p><\/o:p><\/span><\/li><\/ul><p class=\"MsoNormal\" style=\"margin-left:18.0pt;line-height:normal\"><span style=\"font-size:11.0pt\">- 21:9 ultrawide screens are still new to the market<o:p><\/o:p><\/span><\/p><p class=\"MsoNormal\" style=\"margin-left:18.0pt;line-height:normal\"><span style=\"font-size:11.0pt\">- The majority of content and meeting room\r\ninfrastructure is suited for 16:9 resolutions<o:p><\/o:p><\/span><\/p><p class=\"MsoNormal\" style=\"margin-left:18.0pt;line-height:normal\"><span style=\"font-size:11.0pt\">- 21:9 ratio screens need a dedicated computer to\r\nsupport ultra-wide resolutions<o:p><\/o:p><\/span><\/p><p class=\"MsoNormal\" style=\"margin-left:18.0pt;line-height:normal\"><span style=\"font-size:11.0pt\">- 21:9 ratio screens are best suited to applications such\r\nas Front Row on Windows MTR or collaborative planning<o:p><\/o:p><\/span><\/p><p class=\"MsoNormal\" style=\"margin-left:18.0pt;line-height:normal\"><span style=\"font-size:11.0pt\">- 16:9 ratio screens are best suited to Bring Your Own\r\nMeeting (BYOM) environments where content is routed via a sharing device or video\r\ninfrastructure.<o:p><\/o:p><\/span><\/p><p class=\"MsoNormal\" style=\"margin-left:18.0pt;line-height:normal\"><span style=\"font-size:11.0pt\">- Windows and MacOS both support 21:9 resolutions if\r\ndirectly connected \u2013 Android does not.<o:p><\/o:p><\/span><\/p><p class=\"MsoNormal\" style=\"margin-left:18.0pt;line-height:normal\"><span style=\"font-size:11.0pt\">- Switchers, matrices and other infrastructure currently\r\ndo not support ultra-wide resolutions<o:p><\/o:p><\/span><\/p><p class=\"MsoNormal\" style=\"margin-left:18.0pt;line-height:normal\"><span style=\"font-size:11.0pt\">- Wireless sharing devices currently do not support\r\nultra-wide resolutions<o:p><\/o:p><\/span><\/p><p class=\"MsoNormal\" style=\"margin-left:18.0pt;line-height:normal\"><span style=\"font-size:11.0pt\">- Most laptops will only support ultra-wide resolutions\r\non an extended desktop (screen 2). - If\r\nyou mirror your primary laptop screen it will be 16:9.<o:p><\/o:p><\/span><\/p><p class=\"MsoNormal\" style=\"margin-left:18.0pt;line-height:normal\"><span style=\"font-size:11.0pt\">- Most screens have an HDMI2.0 input which will support\r\n21:9 ratio at lower resolutions (3440x1440 or 3840x1660). To support 21:9, 5K resolution DisplayPort or\r\nUSB-C Thunderbolt cables should be used. \r\nPassive Thunderbolt has a limited cable length. Active Thunderbolt is required to run longer\r\ndistances.<o:p><\/o:p><\/span><\/p><p class=\"MsoNormal\" style=\"margin-left:18.0pt;line-height:normal\"><span style=\"font-size:11.0pt\">- If you provide 16:9 resolutions to a 21:9 screen you\r\ncan either:<o:p><\/o:p><\/span><\/p><p class=\"MsoNormal\" style=\"margin-left:54.0pt;line-height:normal\"><span style=\"font-size:11.0pt\">Display the native image, which will show black bars\r\non either side of the screen<br> OR,<o:p><\/o:p><\/span><\/p><p class=\"MsoNormal\" style=\"margin-left:54.0pt;line-height:normal\"><span style=\"font-size:11.0pt\">Set the screen to stretch the image, which degrades\r\nimage quality<\/span><\/p><p class=\"MsoNormal\" style=\"margin-left:54.0pt;line-height:normal\"><span style=\"font-size:11.0pt\"><o:p><br><\/o:p><\/span><\/p><p class=\"MsoNormal\" style=\"margin-left:54.0pt;line-height:normal\"><span style=\"font-size:11.0pt\"><o:p><br><\/o:p><\/span><\/p><p class=\"MsoNormal\" style=\"line-height:normal\"><span style=\"font-size:11.0pt\">It\r\nis important that you understand your requirements before\r\nrecommending a 21:9 screen and they understand why they may not be able to get\r\na full, native full screen image on an ultra-wide screen<\/span><\/p><p class=\"MsoNormal\" style=\"line-height:normal\"><span style=\"font-size:11.0pt\"><o:p><br><\/o:p><\/span><\/p><p class=\"MsoNormal\" style=\"line-height:normal\"><span style=\"font-size:11.0pt\"><o:p><br><\/o:p><\/span><\/p><h3>Still unsure?<o:p><\/o:p><\/h3><p>\r\n\r\n\r\n\r\n\r\n\r\n\r\n\r\n\r\n\r\n\r\n\r\n\r\n\r\n\r\n\r\n\r\n\r\n\r\n\r\n\r\n\r\n\r\n\r\n\r\n\r\n\r\n\r\n\r\n\r\n\r\n\r\n\r\n\r\n\r\n\r\n\r\n\r\n\r\n\r\n\r\n\r\n\r\n\r\n\r\n\r\n\r\n\r\n\r\n\r\n<\/p><p class=\"MsoNormal\" style=\"margin-left:72.0pt;text-indent:-72.0pt;line-height:\r\nnormal\"><span style=\"font-size:11.0pt\">Speak to Nick in the Ascentae support\r\nteam. He still remembers Betamax.<o:p><\/o:p><\/span><\/p>","author_id":5,"category_id":7,"status":"published","created_at":"2026-02-09 15:52:00","updated_at":"2026-02-09 15:56:39","username":"nick","first_name":"Nick","last_name":"Palmer","profile_photo":"assets\/user\/profile\/1788702782_nick (1).png","cat_name":"Pre-Sales","search_score":24}]}
Pre-Sales
2 months ago
Nureva HDX Series - Pre-Installation Considerations
IMPORTANT NOTE: This is a summary of the full HDX User Guide, provided by
Nureva. We strongly recommend that you
read this in full prior to purchase / installation of any HDX system.This overview is provided by Ascentae as a basic guide of
what to look for to ensure a smooth installation of HDX systems in a typical
deployment. As such, advanced
functionality such as integration with 3rd party subwoofers, Adaptive
Voice Amplification and Adaptive Voice Lift are not included in this overview. Additional guidance for these scenarios can
be found in the full HDX User Guide.For the purposes of this overview, all rooms are considered
to be regular shape. For details of
options in irregular shaped rooms, refer to the full guide.As this guide is provided as a pre-installation reference,
it does not cover the installation process.
Details of installation best practice can be found in the full guide or
on the Nureva support site – support.nureva.com.
The full HDX guide can be found here - https://www.nureva.com/user-guide/hdxHDX OverviewThe Nureva HDX series is a mutli-component audio system
which is suitable in spaces up to 223m2. It consists of 3 elements –
Providing full range distributed audio, adaptive voice lift, adaptive voice
amplification, full room microphone coverage, assisted listening via Auracast
and full connectivity to UC platforms (Teams, Zoom etc).
The HDX series offers 5 modular configurations, consisting
of 3 components.System Hub All in one system eliminating need for separate DSP’s, amps and Bluetooth transmitters
-
AV-over-IP for single cable installation
-
Bluetooth audio streaming
-
Auracast broadcast audio
-
Intelligent compute features including camera
tracking, controller integration & device management
-
Passive cooling for quiet operation
Sleep mode for energy conservationAudio Bars
Speakers / microphones combined in single, easy to install unit to support
distributed audio.
-
Full range distributed audio and full room
microphone coverage
-
2-way speaker system with tweeter & dual
woofer
-
2 dimensional microphone array
-
Single Ethernet connection to hubFlexible horizontal or vertical installation- Flexible horizontal or vertical installationMicrophone Pod (option)
Spports Microphone Mist for improved full room coverage
-
2 dimensional microphone array
-
Single Ethernet connection to hub
-
Flexible installation on wall or ceilingHDX ConfigurationsPrior to purchasing a HDX system consider the following-
Room Dimensions – get accurate measurements of
room-
Active locations – note where people speak,
seating & presenter areas and if there is a ‘front of room’-
Room environment – consider which physical
locations are best for HDX component placement-
Room acoustics – assess reverberation &
background noise to determine best placement for HDX components.Coverage for each HDX configuration is based on the length
of the longest wall. For rooms with a
more complex geometry, consider a larger configuration or add microphone pods
to provide best coverage.-
2 HDX Audio bars are suitable for rooms up to
91.m in length-
4 HDX Audio bars are suitable for rooms up to
18.3m in length
-
Microphone pods can be added to extend pickup
coverage and support Adaptive Voice LiftHDX Placement Guidelines
In order to provide best audio coverage in any given space,
follow these principles:
1.
Maintain a clear line of sight between audio
bars & microphone pods. The system
performs best when they have a clear, unobstructed view of each other and the
room.
2.
Avoid obstacles.
Avoid placing components behind pillars, inside alcoves and in recessed
areas.
3.
Stay clear of noise sources. Position components away from HVAC vents,
fans and other equipment that produces continuous background noise.Audio Bar PlacementAudio bars can be mounted horizontally or vertically on the
wall using the supplied mounting bracket, or on VESA standard mounting
solutions (display mounts, floor stands, mobile carts etc).Firstly, consider whether the space has a defined ‘front of
room’ as this is the natural focal point of a meeting or presentation where
audience attention is focused.2 Audio Bar Solution
Ideally, for rooms with a defined front position, place 2
audio bars along this wall, evenly distributed (¼ and ¾ points on along the wall) to provide
balanced audio for both presenters and audience.For spaces without a defined ‘front of room’, the optimal
positioning should be on the same long wall.For more details, refer to HDX User Guide - https://www.nureva.com/user-guide/hdx/placement4 Audio Bar SolutionUse a balanced, symmetrical layout to provide consistent
coverage across the room.
For spaces with a defined ‘front of room’, there are
multiple options for positioning.For spaces without a ‘front of room’ the bars should be
positioned evening along the long walls to provide consistent coverage.Audio Bar OrientationHDX Audio bars can be mounted vertically or horizontally.-
Vertical orientation (default) – microphones are
positioned in the upper half of the bar, to provide optimal localisation and
clarity
-
Horizontal orientation – the speaker drivers
need to be positioned towards the outer edges of the room for even sound
distribution. This works best when
working around windows and other obstacles.
Guideline
Measurement
Why this
helps
Suggested
height from floor
91 – 366cm
Audio bars
being placed at or above head level will help direct sound towards listeners
and improve microphone pickup. Maintain minimum clearance of 8cm above the audio bars for wall mount
installation and service
Minimum distance
from adjacent wall or corner
30cm
Avoide
placing audio bars on walls close to corners to reduce echo. If corner placement is required, angle the
audio bars to face into the room using a VESA standard mounting solution (not
provided).
Minimum
spacing between audio bars
152cm
Adequate
space between the audio bars helps prevent them playing directly into other
components, reducing echo and supporting consistent performance
Microphone Pod PlacementOne or two microphone pods may be mounted on the ceiling,
wall or VESA standard mounts, depending on room layout, furniture arrangement
and location of primary talker.The below layouts demonstrate different placement examples
but microphone placement is flexible depending on the use case.
Examples – 1 microphone podExamples – 2 microphones podsMicrophone Pod installation
Installation is very flexible. The supplied bracket supports any orientation is supported except for
upside down on a wall.Microphone Pod Mounting Guidelines
Guideline
Measurement
Why this
helps
Typical
ceiling-mounted height
244 to366cm
The coverage
and sensitivity of the microphones are balanced, helping capture voices
clearly
Minimum wall
mount height
91cm
The placement
of microphone pods above seated height helps maintain clear pickup.
Minimum
spacing from audio bars
152cm
Adequate
spacing between microphone pods and audio bars ensures speakers and
microphones are not facing directly towards each other, reducing echo and
supporting features such as Adaptive Voice Amplification and Adaptive Voice
Lift
System Hub Positioning
The HDX system hub can be placed on a table, shelf or rack,
or wall mounted. Regardless of
placement, ensure adequate ventilation an an unobstructed Bluetooth connection.For optimal placement consider
-
Side ventilation: allow at least 56mm of
clearance
-
Top ventilation: allow at least 86mm of
clearance above
-
Heat considerations: do not install the system
hub near other devices that generate heat.
Ambient temperature must remain below 40°C
-
Bluetooth antenna: ensure it is upright for best
signal strength. Antenna extender are
not recommended.
-
Password and enrolment code are located on the
base of the system hub. Make a note of
these prior to final installation of the hub as they will be needed to enrol
system into Console.
If in doubt, Ask Ascentae
We are here to help. If you have any questions or concerns about a
solution, please contact the support team
- support@ascentae.com.
47 hits
.png)
Nick Palmer (@nick)
July 14, 2026
Installation
7 months ago
Nureva HDL410 – Best Practice for Camera Integration Direct Integration
Nureva HDL410 – Best Practice for Camera IntegrationDirect Integration Before installing a camera steering and switching solution to integrate with your Nureva audio solution, we recommend you refer to the below information and important links.You can find comprehensive instructions on installing and configuring a Nureva / camera solution on the Nureva Support site.This article gives guidance you may not find online, plus some Top Tips that we have picked up.Understand the customer requirementsNureva can support both camera steering (tracking/switching presets), and camera switching (changing to different cameras).It is important to have a view of the customers room, and understand which areas of the room need to be covered by a camera. From this, you can determine the number of cameras required and the fields of view.If you have any queries about this, please contact Ascentae for advice. We can even offer a full pre-installation consultancy service to help with this.Understand the limitations of the technology – HDL300 / HDL310 When integrating with a HDL300 or HDL310, you have a single sound bar – and so only one point of reference. The information passed to the camera controller is based on the central point of the sound bar. This makes it an ideal solution for azimuth presets, with a single camera mounted in line with the centre of the sound bar.Typically, up to 8 presets can be configured, each covering 22.5° of the room.The same is true if you have the legacy Dual HDL300 system. The reference point for camera tracking will be the centre point of the primary sound bar (plugged into port 1 on the Connect Module). The 2nd sound bar is not used for camera tracking).If using more than one camera, the best position for the cameras is either side of the sound bar, each covering half the room and using 4 presets.Understand the limitations of the technology – HDL300 / HDL310The HDL410 has 2 sound bars and when correctly positioned in the room, they can deliver accurate X,Y coordinate information to the camera controller. Depending on the sophistication of the camera controller, it can interpret those coordinates in different ways. Select appropriate camera and steer to coordinate location Select appropriate camera and steer using presets Select appropriate camera and switch to pre-defined zoneNote: Not all camera controllers support all these modes. Refer the camera vendor documentation for details.Camera zoning is covered in detail in a separate knowledge base article.Choosing the correct cameraNureva have created a suite of API calls which different camera providers have utilized to integrate with the Nureva devices. Currently these are Aver and Lumens, plus drivers and sound tracking modules by Crestron and Extron.Typically, each camera vendor has created a software camera controller (in some instances it may be a hardware device). Nureva confirm compatibility with the camera controller. However, not all cameras from a specific vendor will be supported on the controller software. It is the responsibility of the integrator to confirm compatibility of cameras and camera control solution.Make sure you check the focus length / zoom capabilities of the proposed camera. If you are installing in a large room, the camera should be able to zoom and focus clearly on the furthest participant.Currently supported camera drivers are as follows.Note that camera switching is not supported by PTZApp 2 (single camera only)Note that camera switching is not supported by CamConnect Lite (single camera only)Cameras that support preset recall and have a Crestron module can support sound location data.Cameras that support preset recall and have an Extron driver can support sound location data.Positioning of the Nureva Sound BarsFor the HL300 / HDL310 remember that the camera reference point is the centre of the sound bar.The ideal position for the sound bar is above the screen – allowing sufficient clearance for the audio to be reflected off the wall into the microphones.It is important that there is no obstruction underneath the sound bar as this will degrade audio quality and cause inaccurate sound location data.To ensure best audio performance, measure how far your screen sits from the wall, and mount the sound bar so the bottom is 1.5 x this distance.E.g. if you screen sits 10cm proud of the wall, the bottom of the sound bar should be 15cm from the top of the screen.Refer to the Microphone clearance requirements guide for more detailshttps://support.nureva.com/docs/installation-hdl300-microphone-clearance-requirements-and-recommendations-2We recommend that cameras are mounted underneath the screen where possible, but if underneath HDL sound bar, allow at least 6” (15cm) clearance from the top of the camera to the bottom of the sound bar.Available ResourcesSupported camera solution - https://support.nureva.com/docs/supported-integrations-for-camera-switching-and-tracking-1Aver Integration Instructions - https://support.nureva.com/docs/integrate-aver-cameras-with-camera-trackingLumens Integration Instructions - https://support.nureva.com/docs/how-to-integrate-with-lumens-ptz-camerasCrestron Module Instructions - https://support.nureva.com/docs/use-crestron-sound-tracking-moduleExtron Driver Instructions - https://support.nureva.com/docs/using-extron-sound-tracking-driverWatch out for reflectionsCameras are dumb and can easily be confused by reflections in windows.Be mindful of setting presets that can catch reflected images, or setting the camera to track in areas where windows will reflect if it’s dark outside.Ideally, curtains or blinds will not only avoid this issue, but have the additional benefit of reducing echo and reverberation in the room and so improve performance of the HDL device.If in doubt, ask AscentaeWe are here to help. Please ask if you need any guidance, or would like to engage us to do a consultation on HDL and camera integration.
46 hits
Nick Palmer (@nick)
February 8, 2026
Installation
7 months ago
Nureva Audio - Camera Zoning Guide
Nureva HDL410Best Practice for Camera Zoning Before installing a camera zoning solution to integrate with your Nureva audio solution, we recommend you refer to the below information and important links.You can find comprehensive instructions on installing and configuring a Nureva / camera solution on the Nureva Support site.This article gives guidance you may not find online, plus some Top Tips that we have picked up. Understand the customer requirementsWhen integrating the HDL410 for camera zoning, you can install up to 3 cameras covering different areas of the space.A typical use case may be a presenter / audience configuration, with a camera facing the front of the room for presentations and another 1 or 2 covering the audience.We also see this in use in larger meeting rooms where a single camera struggles to cover the entire room.If you have any queries about this, please contact Ascentae for advice. We can even offer a full pre-installation consultancy service to help with this. Understand the limitations of the technologyThe HDL410 will deliver X,Y co-ordinates to an Inogeni Cam230 camera switcher, enabling it to switch to a camera relating to a specific zone in the room.It is then a function of the camera to Pan, Tilt and Zoom within that zone. Additional camera software may be required to enable this.Zones cannot overlap – or be too close together – as this could result in the cameras switching incorrectly.Both the HDL410 and Inogeni CAM230 MUST be connected to a network and the HDL410 MUST have internet access and be enrolled in Console Cloud.Choosing the correct cameraThe Inogeni CAM230 allows up to 3 cameras to be integrated – 2 USB and 1 HDMI. Alternatively, a 3rd USB camera can be supported using the Inogeni U-CAM convertor.This gives great flexibility and allows different types of camera to be used depending on the application.For example, a framing camera (such as Huddly L1) could be used to accurately frame a presenter as they move around the front of the room and a PTZ camera could be used for the audience. A 3rd, static camera could be trained on a whiteboard to capture the content when someone is writing on the board.Positioning of the Nureva Sound BarsIt is strongly recommended that the 2 sound bars are mounted on opposite or adjacent walls to provide the most accurate sound location data. As with all installations of Nureva sound bars, ensure the sound bars are not mounted directly above a screen or other obstruction.We have found that any obstructions underneath the sound bar can cause problems with accurate sound location data, so ideally they should be mounted with nothing underneath them. However, if this is not possible, refer to the Microphone clearance requirements guide for details on how to install.https://support.nureva.com/docs/installation-hdl300-microphone-clearance-requirements-and-recommendations-2 Creating camera zonesBe aware that unless your room is acoustically perfect, X, Y coordinates will always have a margin for error.Ideally, make your zones generous and leave at least 50cm gap between them. If zones are too small, or too close together, in room echo can cause inaccuracies and cause the camera to switch unnecessarily.It is generally better to have the system revert to the default camera than to focus on the wrong person or continually switch cameras if someone is sat on the edge of 2 zones which are too close together.Watch out for reflectionsCameras are dumb and can easily be confused by reflections in windows.Be mindful of setting presets that can catch reflected images, or setting the camera to track in areas where windows will reflect if it’s dark outside.Ideally, curtains or blinds will not only avoid this issue, but have the additional benefit of reducing echo and reverberation in the room and so improve performance of the HDL device.If in doubt, Ask AscentaeWe are here to help. Please ask if you need any guidance, or would like to engage us to do a consultation on HDL and camera integration.Available ResourcesInogeni Integration FAQ’s - https://support.nureva.com/docs/technical-faqs-hdl410-and-inogeni-cam230Inogeni Integration Guide - https://support.nureva.com/docs/integration-guide-hdl410-and-cam230
25 hits
Nick Palmer (@nick)
February 8, 2026
Pre-Sales
7 months ago
21:9 vs 16:9 aspect ratios - considerations before you buy
Is History Repeating Itself?
A meditation on 21:9 vs 16:9 Aspect RatioNote: This
article contains cultural references. If
you were born before 1990, ask your dad.Commercial
displays are going through a bit of a revolution – at least, that’s what some
manufacturers would have us believe.
Thanks to advances in production technology, we now have access to
ultra-wide 21:9 screens that provide a significantly broader canvasAnd yes,
they look impressive. With around 33%
more display area than a standard 16:9 screen of equivalent height, they offer
additional space for digital signage, video meetings and collaborative
workspaces.But let’s
not get carried away – bigger isn’t always better. Sometimes, it’s just…wider.A brief history of Aspect RatiosTo
understand the pros and cons of 21:9, let’s take a nostalgic trip back to 1998.The era of
crop tops, tiny handbags and boy bands. Robbie
went solo; 5ive, Aqua & Fat Les stormed the charts. At the cinema we cried at Saving Private
Ryan, held our breath in Armageddon and were confused by The Avengers (the one
with Eddie Izzard and some bees, not the other one). England didn’t win the
World Cup. Again.It was the
year of the £2 coin, the Ford Focus, DVD’s and the start of digital
television. An visual revolution was
starting.Back then,
TVs (and commercial screens), were based on CRT technology so were big, bulky
and immovable. They were also 4:3 aspect
ratio. Want to know the spec of the
screen? Check out those horizontal
lines. How about that interlacing?
TV was
broadcast in 4:3, and most movies were released on VHS in the same aspect
ratio.Then came the
game changer: flat screens. First
plasma, then LCD. These were larger,
slimmer and – crucially – widescreen. We
stopped obsessing over lines and instead became familiar with new buzzwords – 720P
HD, 1080i, and Full HD.But the
content didn’t keep up. That fancy new
widescreen? It showed black bars on the
sides unless you were watching something special. Even today, catch and old episode of Top Of
The Pops to relive that nostalgic glory (and terrible haircuts).With the
launch of digital TV, some content began appearing in widescreen. At last, we could use the missing third of
the screen. DVDs followed suit, with
options for aspect ratio settings to match your screen. Now you could stretch your content to fill
the display, but you would have squashed heads and pixellated everything. Anamorphic fill? No thanks.Then came
Blue-ray in 2006. Finally, content
matched our screens. Native 16:9 was here,
and HD channels began broadcasting in earnest – only 8 years after flat screens
had hit the market.Why the
delay? Well, when TV cameras cost
£25,000 apiece – and up to 20 of them could be used on a single show –
broadcasters were reluctant to reinvest.
Especially when no one was sure of HD wasn’t just another fad. Remember 3DTV? No? My
point exactly.Fast forward to Today : Welcome 21:9Unlike
the shift from 4:3 to 16:9, which was driven by the consumer market, the
current wave of 21:9 displays is primarily a business-led evolution. These ultra-wide screens are designed to
offer more information on signage and provide richer experiences in meeting.They’re
especially good for touch applications.
Wider screens mean that more people can interact together – and
crucially, no one needs a stepladder to reach the top.However,
we nor find ourselves in a familiar place: a transitional period. We’re stuck between current 16:9 HD resolutions
and new 5K resolutions in 21:9 aspect ratio.As
always, early adopters face challenges.
The infrastructure to support native 5K content simply doesn’t exist
yet. It’s Betamax, LaserDisc and HD-DVD
all over again.If
your application already supports 5K (or at least a lower resolution 21:9 ratio),
then great. You’re ahead of the
curve. But if not, your fancy new
display may be stuck with the same black bars we saw in the early 2000’s, or
you can use built-in image stretching.
And while this tech has come a long way, it still can’t prevent everyone
on a Teams call looking like Danny DeVito.Let’s
be honest – no one wants their meeting persona to look like something from a
hall of mirrors. So once again, you’re
left with a dilemma : underutilise the screen or settle for distorted content.When (and when not) to position 21:9 screens Here’s
the deal: if your application can run on a PC where you can force a 21:9
resolution, go for it. Ultra-wide
screens are fantastic in that case.If
not? You may be better served sticking
to 16:9.For
example, a Windows based Microsoft Teams Room (MTR system works well with
ultra-wide displays. Whilst they may not
support full 5K, you choose resolutions like 3440x1440 or 3840x1660 to preserve
21:9 and fill the screen. Plus, you get
the full benefit of Front Row, which much better use of the available space
than the default view.However,
Android based MTR’s do you offer that flexibility. Either stick to a 16:9
screen or proceed with caution.If
you’re running an application on an OPS module, that’s fine too – as long as
your screen accepts OPS or has the correct module. Always double check compatibility before you
buy.Planning
a Bring Your Own Meeting (BYOM) setup?
Be wary. Most laptops run 16:9 native
resolutions. If you mirror the display
onto a 21:9 screen, you’ll get black bars.
If you extend the desktop, some laptops may support 21:9 – but this
depends on the machine.Running
multiple ultra-wide displays for collaborative work? You’ll need a high-spec PC with dedicated graphics
card capable of powering multiple 5K screens.
This is not the time to skimp.
Cabling & infrastructure: not all cables are created equalMost
screens and computers today support HDMI 2.0, but this does not handle 5K
resolution. You can, however, use HDMI
to run 21:9 format at lower resolutions (3440x1440 or 3840x1660), if the
computer supports it.HDMI2.1
and 2.2 are newer and support full 5K resolution, but they are rare in
commercial screens, computers or AV infrastructure.DisplayPort
will support 5K at 21:9 ratio. , but it’s generally found on higher end
desktops, not laptops – unless you add an extra graphics card.USB-C
can support 5K too, but here’s the catch: USB-C is just the shape of the
port. The cable inside could do anything
– from charging your phone to transmitting high-speed video and data. A full-featured Thunderbolt cable is what you
need. And there’s a second issue:
passive Thunderbolt cables max out at 3 meters before the signal degrades. Active cables can run up to 15 meters, but
they’re expensive. And because they are
optical, they are also fragile.If
you’re using switchers or extenders (like ReThink, LightWare, WyreStorm etc),
don’t expect 5K support just yet. Most
of these max out at 4K, and any higher resolution will be scaled back.But
there is good news. Higher spec versions
of these products are on their way. Just
like the migration from 4:3 to 16:9, there is lag between screen technology and
the back end infrastructure. Hopefully,
this time it won’t take 8 years.In summary - your cut out and keep guide for customers- Advances in screen technology tend to happen before
advances in content for the screens- 21:9 ultrawide screens are still new to the market- The majority of content and meeting room
infrastructure is suited for 16:9 resolutions- 21:9 ratio screens need a dedicated computer to
support ultra-wide resolutions- 21:9 ratio screens are best suited to applications such
as Front Row on Windows MTR or collaborative planning- 16:9 ratio screens are best suited to Bring Your Own
Meeting (BYOM) environments where content is routed via a sharing device or video
infrastructure.- Windows and MacOS both support 21:9 resolutions if
directly connected – Android does not.- Switchers, matrices and other infrastructure currently
do not support ultra-wide resolutions- Wireless sharing devices currently do not support
ultra-wide resolutions- Most laptops will only support ultra-wide resolutions
on an extended desktop (screen 2). - If
you mirror your primary laptop screen it will be 16:9.- Most screens have an HDMI2.0 input which will support
21:9 ratio at lower resolutions (3440x1440 or 3840x1660). To support 21:9, 5K resolution DisplayPort or
USB-C Thunderbolt cables should be used.
Passive Thunderbolt has a limited cable length. Active Thunderbolt is required to run longer
distances.- If you provide 16:9 resolutions to a 21:9 screen you
can either:Display the native image, which will show black bars
on either side of the screen OR,Set the screen to stretch the image, which degrades
image qualityIt
is important that you understand your requirements before
recommending a 21:9 screen and they understand why they may not be able to get
a full, native full screen image on an ultra-wide screenStill unsure?
Speak to Nick in the Ascentae support
team. He still remembers Betamax.
24 hits
Nick Palmer (@nick)
February 9, 2026
Pre-Sales
4 months ago
Nureva HDL - Room Readiness Checklist
HDL OverviewThe Nureva HDL series is the ideal solution for most medium
and large meeting rooms. Installation is
quick and easy, and the built-in software automatically calibrates to the room
and continuously adjusts to ensure great audio quality.To get the best out of your HDL solution, check these simple
steps to ensure the room is ready.The HDL consists of 2 elements.The Connect Module 2 which can be positioned
anywhere, but typically will be close to the PC in the roomThe sound bar(s) which need to be carefully
positioned to provide optimal performance.The sound bar is 5' (1524mm) long with 16 downward facing microphones and dual speakers.Room SizeIt is not recommended to use HDL systems in spaces larger
than the maximum size. Doing so will
reduce microphone performance and audio output levels will be reduced at the
extremes of the space and people may struggle to hear.HDL310 – Maximum recommended room size 9.1m x 9.1mHDL410 – Maximum recommended room size 10.7m x 16.8mSound Bar PositioningIncorrect positioning of the sound bar will cause poor
performance. We recommend reading the
Nureva guide before purchasing the system.https://support.nureva.com/docs/microphone-clearance-requirements-and-recommendations
Here are the key points to checkHeight.
The bar should be positioned between 2.16 and 3.05m from floor level to
ensure the microphones are focussed at sitting and standing height. Too low reduces audio clarity when people are
standing. Too high reduces audio clarity
when people are seated.Wall position.
The bar should be at least 1m from a corner to prevent echo.Sources of noiseThe sound bar should not be installed within 1m of a noise source (e.g. HVAC unit). If the HVAC is blowing directly onto the sound bar, allow at least 1.5m clearance.Sound bar clearance. The HDL sound bar has downward facing
microphones to detect both direct audio pickup AND audio reflected from the
wall behind. It therefore imperative
that the bar is positioned flush on the wall with no obstructions immediately
underneath.If the sound bar is to be mounted above a screen (or other obstruction),
measure the depth of the screen from the wall (Y).
To calculate the height of the bottom of the sound bar (X), multiply this by
1.5.X = Y x 1.5 So if a screens sits 10cm from the
wall, the bottom of the HDL sound bar should be 15cm from the top of the
screen. If the unit is mounted above an alcove (or window), there must be at least 15cm
of clear wall underneath the sound bar. Wall construction. The HDL works best when placed on a hard,
flat surface. Avoid glass as it is
overly reflective. Acoustic panelling. The HDL sound bar must never be mounted directly
onto an acoustic panel. Audio will be
absorbed by the panel and mic pickup will be poor. Either remove a section of acoustic panel to
seat the sound bar – with sufficient clear wall underneath, or install a
backboard on top of the acoustic panel
Room AcousticsPrior to installation, we recommend that you test acoustic
levels in the room. Nureva have included
tools for this in their iPhone App (available from App Store).
By testing background noise and reverberation in the room, you can
determine suitability of the HDL for your space.Background noise. Normal human speech is approx. 60 – 65dBA. The HDL priorities human voice, partly by
distinguishing the different dB levels.
Therefore, recommended background noise should be 40-45dBA for optimal
performance.Reverberation (echo). The HDL includes sophisticated algorithms to
eliminate echo. However, if the room is
too reverberant, the algorithms will not be able to compensate.Take a reverberation reading to determine whether echo is too high. If Reverberation Time (RT60) levels are
higher than 0.5 seconds, then acoustic treatment in the room should be
considered before installing a HDL systemCable RunsThe Connect Module 2 and sound bar are connected via a Cat6
Power over Ethernet cable, so connection is easy. However, make sure you have the ability to
run the cable to the sound bar installation spot.The CM2 can be mounted anywhere in the room, typically
behind the screen or in a rack, allowing for simple cabling to the rest of the
AV equipment.We strongly recommend using the cables included in the box and connecting the CM2 directly to the in room computer and not using a USB hub as this can introduce latency.OverheatingThe Connect Module 2 requires good ventilation to prevent
overheating. If it is mounted behind the
screen, ensure it is at the edge to provide air flow. Do not mount it so it is receiving heat
output from other devices. If there are issues with any of
the items on this list, please contact Ascentae support and we will endeavour
to find a solution that works for you and your customer. By doing this prior to installation we can
ensure that both you and your customer get the best possible solution and
minimal downtime and inconvenience.
If in doubt, Ask Ascentae
We are here to help. If you have any questions or concerns about a
solution, please contact the support team
- support@ascentae.com.
23 hits
Nick Palmer (@nick)
May 20, 2026
Updates
6 months ago
GoBright Interact Udpates
Below you will find a table containing all the information regarding the GoBright Interact firmware updates.Date Firmware Notes26/03/20262.5.32Various improvements and Bug fixes18/02/20262.5.29Various improvements and Bug fixes01/12/20252.5.13Hide height adjustable arrowsVarious improvements and Bug fixes13/10/20252.4.7Power control plug support for the Interact has been added. The Power Control Plug is an accessory for GoBright Interact that powers your desk workstation only when checked in, reducing energy use, saving costs, lowering your environmental impact, and increasing the accuracy of your occupancy data. For more information on thePower control plug, check out the GoBright helpcenter article. 03/07/20252.3.2Various improvements and Bug fixes18/06/20252.2.11Translation updates13/06/20252.2.9Various improvements and Bug fixes02/04/20252.1.1OMT support as new desk actuator. Demo mode available for showcasing Interact functions.25/02/20252.0.0A fully updated look and feel, improving the overall user experience.Driving the desk up and down can now be done with just a simple swipe up/down to drive to the desired position: Swipe up to move to standing preset, and swipe down to move to sitting preset.When a desk is closed in the system, the Interact will also show the desk as being closed.Even further back-dated firmware (not recommended by Ascentae):24/01/20251.9.7 Internal sensor (Beta): Improved the Machine Learning algorithm of the built in vibration sensor, to even more accurately detect occupancy.17/12/20251.9.5NFC emulation: Users will now be able to book/check in with the NFC via their smartphone. This will give users more options to book a desk.Internal sensor (Beta): The interact has a built in vibration sensor. This can now be activated for occupancy detection, automatic check in and auto release. This will provide more accurate data and a better user experience. 18/10/20251.8.5Added support for LogicData CB desks (beta).Added support for LogicData DM desks (beta)Added support for Jiecang desks (beta)Touch screen fixes & touch response improvementsGlow fix to turn off glow outside opening hours18/06/20241.6.2Support for 'Open WiFi' connectivityThe Interact can now be commissioned into 'Open WiFi' networks, where access is allowed based on the WiFi MAC addressThe Interact needs to be updated to this firmware version (or higher) to be able to be commissioned on an 'Open WiFi' networkSome for the archives....27/05/20241.6.1Improved support for LINAK desks, not requiring to update the controlbox anymore in specific scenario'sImproved decomissioning supportSeveral small improvements05/04/20251.4.9When linked to a room resource, check-in will not ask for credentials anymore (matching the behaviour of room panels)19/03/20251.4.8Improving Wifi reconnection logic when connection is lostAdded advanced system log storageSeveral minor system improvements05/03/20251.4.5Improving Wifi reconnection logic when connection is lostAdded advanced system log storageSeveral minor system improvementsThis release has a limited rollout, and is not yet available for all customers26/01/20251.2.0Support for Ethernet connectivity via the PoE Expansion Box.18/12/20231.1.17Various improvementsIf you have any questions, please log a ticket with our support desk.
16 hits
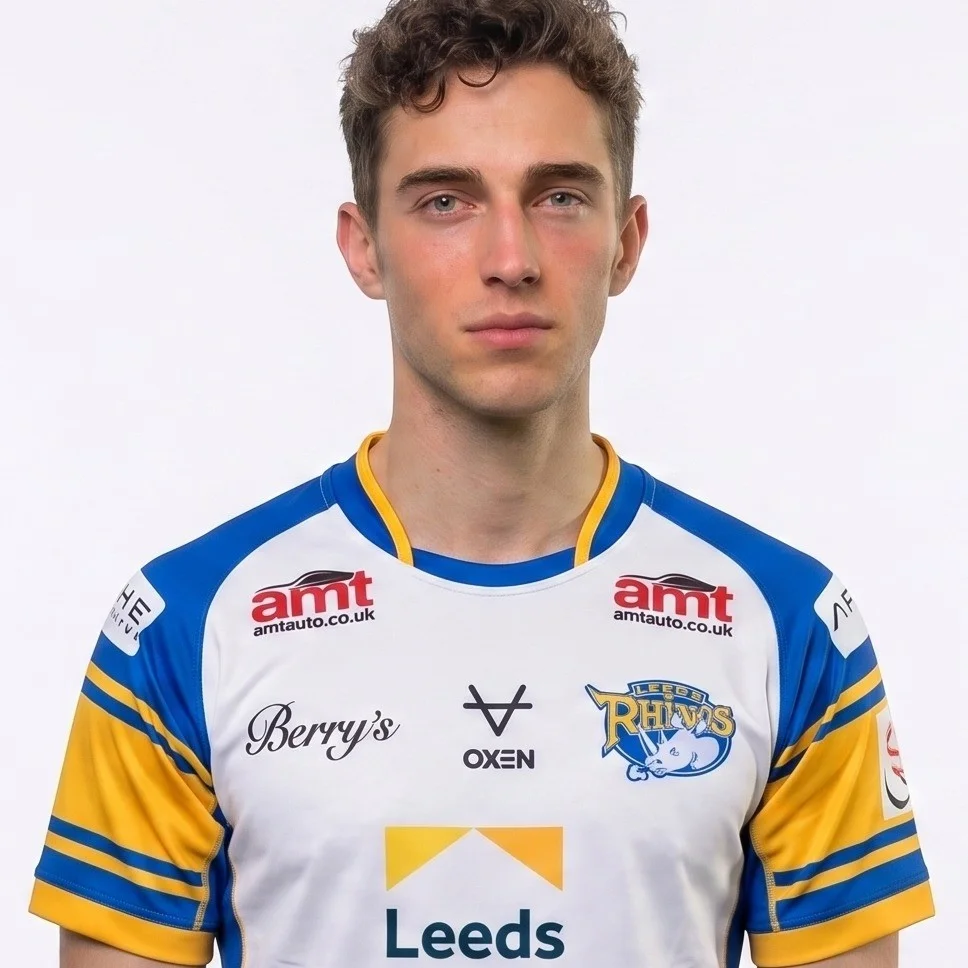
Lee Russell (@lee)
March 2, 2026